Monday, August 29, 2016

How to Merge and Upload Convert GoPro 4K videos to Instagram?

Instagram is a popular photo sharing network that allows user to easily shot, upload and share personal images through social media. But now it is also a place that you can upload and share short videos up to 60 seconds long. Try to upload GoPro 4K video to instagram but video not uploaded? That's because the Instagram video limits. Wheras an Instagram video converter could solve all by converting Instagram video to MP4/H.264 etc.

Instagram Supported Video Detailed Specifications: 

  • Size: maximum width 1080 pixels (any height) 
  • Frame Rate: 29.96 frames per second 
  • Codec: H.264 codec / MP4 
  • Bit rate: 3,500 kbps video bitrate 
  • Audio: AAC audio codec at 44.1 kHz mono 
  • Length: 60 seconds 
  • Filesize: 15MB 
So you can choose a best converter and editor for Instagram. Pavtube Video Converter can done well. It is not only a converter, also a editor. With it, you can easily convert, merge, upload GoPro 4K videos to Instagram best format for for Instagram and adjust Instagram video parameters with originally quality reserved. Besides, professional editing functions are provided to you: split, merge, trim, crop, add watermark, adjust video effect, edit audio and insert subtitles etc.

Hot search: SD/HD/4K to Instagram ǀ DJI Phantom 4 4K to Instagram ǀ how to manage GoPro 4k Videos ǀ convert GoPro Camera 4K video to any format

Mac version - Pavtube Video Converter for Mac

Download the best GoPro 4K videos to Instagram converter and editor


Other Download:
- Pavtube old official address: http://www.pavtube.com/video_converter/
- Cnet Download: http://download.cnet.com/Pavtube-Video-Converter/3000-2194_4-75734821.html

How to Convert, merge, upload GoPro 4K videos to Instagram?

1. Add GoPro 4K Files

Click "Add video" to add AVI files from the PC local to the program, or drage and drop the GoPro 4K videos to the converter.


Step 2. Click "Format" bar, and select .mp4 from "Common video" for Instagram


Step 3: GoPro 4K videos to Instagram MP4 format

  • Go to “Merge into one File” tab to merge several GoPro 4K files into single one for Instagram. 
  • Go to “Edit” tab and open “Crop” “Effect” “Watermark” “Audio” tab to adjust video zoom, adjust image brightness, and add watermark etc. with GoPro 4K to InstagramConverter. 
  • Go to “Setting” tab to adjust video bitrate/codec/resolution and more. 

Step 3. Click the "Convert" button on the main interface and the software will start to convert 4K to Instagram friendly video formats immediately. When the conversion finishes, click "Open" to find the converted video files. Then you can effortless transfer the video files to Instagram for uploading and sharing.

Read More: 

Thursday, August 25, 2016

Vizio TV will not play some MP4 videos? Solved!

Why Encounter Failure When Playing MP4 Video in Vizio TV?

Vizio TV is very popular, it gives you instant access to a world of movies, TV shows, music, Vizio Smart TV gives you more of what you love about TV with all the brilliant picture quality and world-class service you’d expect, but the transferred video files must be in the video formats supported by Vizio TV. Many video formats are not well supported by Vizio TV due to the codecs. For example, MP4 is a container format which supports so many different codecs, you will encounter playback problems with these unsupported video formats.


How to Solve Can't Play MP4 Video in Vizio TV?

Here in order to help you to play MP4 on Vizio LED TV & Vizio 4K TV from USB smoothly, we will share the best MP4 to Vizio TV converter with you, which will help you to convert MP4 files to Vizio TV supported video format, and then you can play converted videos on Vizio TV via USB.

Introduction of Pavtube Video Converter- Vizio TV MP4 Converter

A good video converter will help you to convert videos at fast speed with top quality, now we want to share the best MP4 to Vizio TV converter with you, the program is called Acrok Video Converter Ultimate, it is a powerful program, it can convert MP4 files as well as other HD videos like MKV, AVI, H.265, Tivo etc to the video format you need, such as Vizio TV supported H.264 MP4 format, or optimized formats for smartphones, tablets, editing programs and HDTVs. It is compatible with Windows 10, Windows 8.1, Windows 8, Windows 7, Windows XP. (read review)

Hot search: MP4 to LG TV ǀ MP4 to Sony TV ǀ MP4 to Samsung TV ǀ MP4 to WD TV ǀ MP4 to Apple TV 4 

Mac version - Pavtube Video Converter for Mac

How to Transcode MP4 to Vizio TV with Pavtube Video Converter?

Step 1. Make Preparation: Free download MP4 to Vizio TV Converter


Other Download:
- Pavtube old official address: http://www.pavtube.com/video_converter/
- Cnet Download: http://download.cnet.com/Pavtube-Video-Converter/3000-2194_4-75734821.html

Step 2. Import MP4 video

Click "Add file" button to add MP4 video to the program. You can also use dragging and dropping function and batch conversion function to add many MP4 files.


Step 3. Choose the right videos as output file format.

Click the “Format” bar, from its drop-down list, select Vizio TV supported video codec from “HD Video” > “H.264 HD Video(*.mp4)”.


Tips : Click “Settings” on the main interface to open “Profile Settings” window, click “audio codec” drop-down list, select AAC as the output audio codec for Vizio TV.

Step 4. Click the "Convert" button on the main interface and the software will start to convert MP4 to Vizio TV friendly video formats immediately. When the conversion finishes, click "Open" to find the converted video files. Then you can effortless transfer the video files to Vizio TV for playback on the go.

Read More:

Tuesday, August 23, 2016

Can I add a Tivo codec to Premiere Elements?

When importing a TiVo file, Adobe Premiere Elements would return the error "File Format not Supported" or other error message.

“Is anyone here using Premiere Elements to edit TiVo files? If so, how are you doing it? I’d like to be able to import several TiVo files into Premiere and edit it. Anyone doing such a thing? What’s your workflow? Thanks for any replies.”

The reason the file is not supported is because only a handful of programs currently support .tivo files in their native format, which is MPEG-2 based, but in what someone described as being in a ".tivo wrapper." You will need a program that will work with it in that form, or else removes it so that it will be recognizable by other video software.

An easy-to-use yet professional app Pavtube HD Video Converter for Mac (read review) which can be used as a Mac TiVo to Premiere Elements Converter under macOS Sierra, Mac OS X 10.11 El Capitan, Mac OS X 10.10 Yosemite, 10.9 Mavericks, 10.8 Mountain Lion, 10.7 Lion, 10.6 Snow Leopard, 10.5 Leopard.

With it, you can effortlessly transcode TiVo shows to MPEG-2 video for Adobe Premiere Elements and Premiere Pro CS3/CS4/CS5/CS6/CC, and it works well and converts flawlessly. Meanwhile, the Mac Video Conversion tool can create files compatible with various non-linear editing systems like Avid, FCE, FCP, iMovie, and DaVinci Resolve, etc. For encoding TiVo to Premiere Elements friendly video on Windows, try Pavtube HD Video Converter. Below is how.

Hot search: MXF to Premiere Elements ǀ AVI to Premiere Elements ǀ MP4 to Premiere Elements ǀ 4K XAVC S to Premiere Elements 


Other Download:
Convert Tivo video to Premiere Elements best editable format on Mac

1: Load TiVo files to the program

Start up this TiVo converter program, and then click “Add” to import all .tivo files.


Tip: When first loading, this Mac TiVo Converter will ask you to input your Media Access Key. Simply enter your Media Access Key, and click "OK" to confirm.

2: Choose output profile for Premiere Elements

Select “Format” pull down list to select Adobe Premiere/Sony Vegas> MPEG-2(*.mpg) as the best video format for Premiere Elements.


Tips: You can click “settings” button in the main interface to customize the output video’s parameters, such as resolution, frame rate, etc.

3: Start TiVo to Adobe Premiere Elements conversion

Click the big "Convert" button at the bottom right corner, this Mac video converter will start to convert TiVo to .MPG for Premiere Elements! Once the conversion completes, you are free to use TiVo files in Premiere Elements.

Read More: 

Thursday, August 18, 2016

Adjust Olympus TG-Tracker 4K H.264 MOV to FCP X/7

The Tough TG-Tracker is the latest rugged waterproof action camera from Olympus. The TG Tracker is equipped with a 1/2.3in sensor which can capture 4k video - indeed the sensor itself matches the 16:9 widescreen shape and 3840x2160 pixels of 4k video. The Olympus TG-Tracker can record MOV/H.264 with linear PCM stereo sound video with 4K resolution. The 1080p MOV videos can achieve high quality video in relatively low bitrates. However, this HD video format also causes problem, for example, importing Olympus TG-Tracker 4K H.264 MOV to FCP X/7 for editing.

Tough Final Cut Pro announced it supports MOV for input, the 4K HD video from Canon/Nikon is not compatible with FCP. If you have got 4K H.264 MOV files from Olympus TG-Tracker and suffered the headache from importing and editing these files in FCP, Pavtube HD Video Converter for Mac will get you out of the trouble. This MOV to ProRes Converter offers the best practice to convert MOV to ]FCP highly compatible format - Apple ProRes within few clicks on Mac. (read review)

Key Features of Pavtube HD Video Converter for Mac:

  • Convert all formats including XAVC, XAVC S, XAVC L, H.265, MOV, MP4MKV etc to FCP X/FCP 7. 
  • Custom Video: Personalize videos with diversified video editing tools. 
  • Optimized Presets: Allows you to optimize the output the way you want. 
  • Extract Audio: Extract audio from video to MP3, M4A, AAC, AIFF, WAV, WMA, etc. 
  • Supported OS: It can be compatible with macOS Sierra, Mac OS X 10.11 El Capitan, 10.10 Yosemite, 10.9 Mavericks, 10.8 Mountain Lion, 10.7 Lion and 10.6 Snow Leopard. 
>>>Windows version - Pavtube HD Video Converter

Download and get the best FCP Video Converter:


Other Download:

Convert Olympus TG-Tracker 4K H.264 MOV to FCP X/7 ProRes on Mac

Step 1. Add Olympus TG-Tracker video clips

Install the program on Mac and run it. Drag the 4K .mov files from Olympus Tough TG-Tracker to the software. It supports batch conversion and joining multiple video clips into one file.


Step 2. Choose ProRes as output format

Click the “Format” bar and select Final Cut Pro> Apple PreRes 422(*.mov) as output format. (Kindly Note: Apple ProRes 422 (HQ) have higher qualities. Apple ProRes 422 (LT) and Apple ProRes 422 (Proxy) have smaller sizes. You can choose according to your requirement)


Step 3: Start Olympus TG-Tracker 4K to ProRes conversion

Click the "Convert" button at the bottom right corner to start transcoding 4K H.264 MOV files for FCP. It does Olympus TG-Tracker 4K H.264 MOV to FCP video conversion like a charm and the output files will maximally preserve the quality of your original Olympus TG-Tracker 4K H.264 MOV clips. After conversion, you can import converted video clips into Final Cut Pro X/ or FCP 7 to create the end results that you want.

Additional Tips: If you are also a FCP X user, before you try to do the conversion, don't forget to make sure that you have installed the Apple ProRes Codec manually since the FCP X asks users to install it by themselves.

Read More: 

Monday, August 15, 2016

Loading Nikon Coolpix A900 4K videos to Premiere Pro CC 2015.3

Nikon has more than a few premium compact cameras to reveal today. Along with the announcement of its DL series, the company's also introducing three new Coolpix shooters. The most interesting one of the bunch is the A900, a point-and-shoot camera with a 20-megapixel BSI CMOS sensor, 35x optical zoom, 3-inch tilting screen and 4K movie recording at up to 30 fps. So, is it possible to work Nikon Coolpix A900 4K footage in Adobe? Have tried importing Nikon Coolpix A900 4K videos to Premiere Pro CC 2015.3 but failed? This article will give you the best solution for you.

Until now, there are currently few editing programs that natively support 4K, so editing Nikon Coolpix A900 4K video in Premiere Pro CC 2015.3 is a little difficult. To solve the issue, a quick fix is to transcode Nikon Coolpix A900 4K files to Adobe Premiere Pro most compatible MPEG-2 file type in proper settings. For this purpose, this article mainly shows you how to transcode Nikon Coolpix A900 4K footage to MPG for Premiere Pro with the best 4K to Premiere video tool.

Here we sugget the best one - Pavtube Video Converter for Mac. It can convert Nikon Coolpix A900 4K videos to Premiere Pro CC 2015.3 best editable MPEG-2 format on Mac (macOS Sierra, El Capitan etc). Besides, this powerful 4K video converter also can convert all common, HD, 4K, 3D videos to all popular video and audio formats like AVI, H.265, M3U8, MP4, MOV, MKV, MPG, FLV, 3D, etc. For playing on HD media player, Tablets, Smartphones, Game consoles, 4K TV, 3D TV, Projectors, etc.

Hot search: 


Other Download:
- Pavtube old official address: http://www.pavtube.com/video-converter-mac/
- Cnet Download: http://download.cnet.com/Pavtube-Video-Converter/3000-2194_4-76179460.html

How to Adjust Nikon Coolpix A900 4K videos to Premiere Pro CC 2015.3 friendly format?

Step 1. Add Nikon Coolpix A900 H.264 files

Just Click "Add" icon to load video files from Nikon COOLPIX A900 into file list. Batch conversion is also supported by dragging and dropping Nikon Coolpix P900 A.264 files one by one or the folder where Nikon Coolpix A900 H.264 files are to the main interface of the program.


Step 2. Choose Output Format

This video converter offers optimized format preset for Adobe Premiere CC 2015.3. Just click "Format" menu firstly and then follow "Adobe Premiere/Sony Vegas" to set MPG, MOV or WMV format.


Tips: You can click "settings" button in the main interface to customize the output video's parameters, such as resolution, frame rate, etc.

Step 3. Start conversion

Click the “Convert” button to start converting Nikon Coolpix A900 4K H.264 MPEG-4 to Premiere Pro.CC 2015 3. After that, click the “Open” button to locate the output files and transfer the files to Premiere Pro CC 2015.3 as usual.

Read More: 

Thursday, August 11, 2016

Edit Blade Chroma 4K in Windows Movie Maker on Windows 10

Nowadays more and more cameras like Blade Chroma 4K is able to capture UHD 4K videos. Before uploading the Blade Chroma 4K videos to YouTube, Vimeo, etc. or posting them on Facebook, many folks love to edit them to make them more stylish. However, when you try to import the recorded Blade Chroma 4K footage to Windows Movie Maker for editing, you'll find it a painful experience. Isn't it possible to edit Blade Chroma 4K videos with Windows Movie Maker? Read on for details.

If your computer meets above listed requirements, you will have no problem to work Blade Chroma 4K video with Windows Movie Maker, however, it won't edit the video as it is, instead, it will render the Blade Chroma 4K files down and output a 1080p file. However, that does not mean that you can throw any 4K video to Windows Movie Maker, the Blade Chroma 4K video should be listed in Windows Movie Maker supported formats list as below:


Actually, it's not as difficult as you imagine. What you need is just a common video converter like Pavtube Video Converter (support Widnows 10).It supports creating high quality WMV video for your Windows Movie Maker, no matter what's the format of your source video files. It can convert almost any video to WMV so you can import your video to Windows Movie Maker for editing. Plus, it comes with all regular video editing tools like Trim, Crop, Effect, Subtitle, Watermark. For basic video editing tasks, you can even replace your Windows Movie Maker with it. Below is the entire process of converting Blade Chroma 4K videos to Windows Movie Maker.

Note: If you want to edit the Blade Chroma 4K video with some Mac popular editors like FCP, iMovie, Premiere Pro CC 2015.3, Avid MC, DaVinci Resolve etc, you can also adopt the Pavtube HD Video Converter or Pavtube HD Video Converter for Mac.

Hot search: * Blade Chroma 4K to Premiere Pro CC 2015.3  * Blade Chroma 4K to Youtube/Vimeo  * Blade Chroma 4K in FCP X 

Now download the best 4K to Windows Movie Maker video converter:


Other Download:
- Pavtube old official address: http://www.pavtube.com/video_converter/
- Cnet Download: http://download.cnet.com/Pavtube-Video-Converter/3000-2194_4-75734821.html

How to Convert Blade Chroma 4K Files to WMV for Windows Movie Maker on Windows 10

Step 1: Import Blade Chroma 4K files.

Click the button “File” to add MXF files (or directly drag and drop your files) to the Converter.


Step 2: Select an output format for Windows Movie Maker.

Click “Format” bar to select suitable format for Windows Movie Maker. WMV is one of the proper formats for Windows Movie Maker.


Step 3: Tap the“Settings”icon to adjust audio and video parameters for Windows Movie Maker.

Once you have chosen the output format, then click the "Settings" right beside "Format" to adjust the video and audio parameters.

Step 4: Tap the big Convert button on the main interface to start transcoding Blade Chroma 4K to Windows Movie Maker.

The conversion should be quickly finished. Once the process is at 100%, you can have the converted file easily worked with Windows Movie Maker.

Read More: 

Monday, August 8, 2016

No Audio in GoPro Videos after update to Premiere Pro 2015.3? - Solved!

If you have record some videos from GoPro camera including (GoPro Hero4, Hero3+, GoPro Hero3, Hero2 etc), you may wanna import GoPro videos into the latest Adobe Premiere Pro 2015.3 on Mac to edit them according to your own request so you can upload them to YouTube/Vimeo, or output to other social media endpoints. But maybe you will encounter the following problems:

“After the latest Update of Premiere Pro all my GoPro Videos have no audio what to do?”

"I just updated Premiere July 2016 which I'm always reluctant to do due to new bugs, the first thing I noticed was all my GoPro Hero MP4 files are no longer recognised. It says media is offline. Secondly, all my windows icons are now blank. Thirdly, all my historical menu files are from about 2 years ago, WTF? When i trying to import a new go pro files, i have just video file in my bin and not a video/audio file as ever.... 


So, what does Gopro video to Adobe Premiere Pro 2015.3 workflow look like? Now you are in the right place to learn about how to get Gopro raw files editing with Premiere Pro 2015.3 on Mac.

Why can't I get Gopro MP4 work with Adobe Premiere Pro CC 2015.3?

Gopro is an American manufacturer of action cameras, which is often used in extreme-action videography, including HERO4 Silver Waterproof Camera, HERO4 Black 4K Ultra HD Waterproof Camera, HERO4 Session Waterproof Camera, etc.. It has the ability to capture videos with different resolutions from high-resolution 4K video (3840 x 2160 pixels) to low-resolution WVGA video (848 x 480 pixels) in MP4 files with H.264 video (AVC) and AAC audio codecs. But the MP4 formats of GoPro cameras are not the ideal editing formats for Adobe Premiere Pro CC 2015.3 on Mac. Below is a format that listed all formats supported by Adobe Premiere Pro CC 2015.3.


It clears shows that MP4 file codec compatible with Adobe Premiere Pro CC is just QuickTime Movie and XDCAM EX, while Gopro recorded MP4 files with H.264 video (AVC) and AAC audio codecs used in Gopro camera is not supported. So you cannot import GoPro video into Adobe Premiere Pro for editing on Mac directly.

In order to edit GoPro videos perfectly with Adobe Premier Pro CC 2015.3, the quick workaround is to transcode GoPro MP4 files to Premiere Pro CC 2015.3 natively supported format like MPEG-2, MOV(AVC) in the best settings(1080p would the best). Along with some help from third-party software, it can be done effortlessly.

Hot search: * MTS media to Premiere CC-2015.3 * TS files into Premiere Pro CC 2015.3  * MP4 to Premiere Pro CC  * MKV to Premiere Pro CC 

Try the best Pavtube GoPro to Premiere Pro CC 2015.3 converter for Mac. As the best Mac GoPro Video Converter, it can convert GoPro footage to Premiere Pro CC 2015.3 preferred MPEG-2 with fast encoding speed and without quality loss. It helps you fast transcode any GoPro HD/4K video to any format you need. What’s more, it’s the optimal tool for transcoding GoPro, Sony, Canon, Nikon, Panasonic, etc camera or camcorder videos to kinds of NLE programs Avid Media Composer, Adobe Premier Pro, Final Cut Pro, FCE, DaVinci Resolve Lite and more. (read review)

For Widnows user, please turn to the Pavtube Video Converter. Just download it and follow the simple guide to start converting GoPro Videos to Premiere Pro 2015.3 best format.


Other Download:
- Pavtube old official address: http://www.pavtube.com/video-converter-mac/
- Cnet Download: http://download.cnet.com/Pavtube-Video-Converter/3000-2194_4-76179460.html

How to quickly convert GoPro videos into Adobe Premiere Pro CC 2015.3

Step 1. Creat a folder for saveing GoPro videos

Launch Gopro video converter on your Mac. Create a folder with the original GoPro video on your hard drive.

Step 2. Load Gopro videos

Choose all the GoPro videos in your folder, drag & drop or through File > "Add Video/Audio" button/"Add from folder" button to import source GoPro videos into the Pavtube Video Converter for Mac interface.


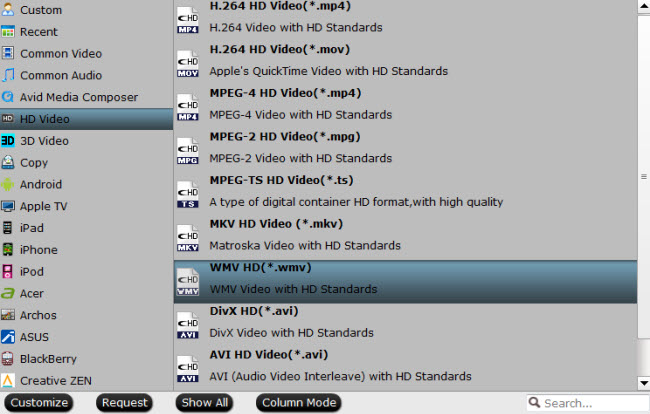
Step 3. Choose proper output format Premiere Pro CC 2015.3 preferred

Click "Format" pull down list to select "Adobe Premiere/Sony Vegas> MPEG-2(*.mpg)" as the best video format for Adobe Premiere Pro CC/CS6/CS5. Another two specialized formats "WMC (VC-1) (*.wmv) and "MOV (AVC) (*.mov)"are the good choice as well.


Tip : If you want to customize video and audio encoding settings to get the best quality you want, just click the "Settings" button to customize the output video/audio resolution, frame rate, bit rate, etc.

Step 4. Start converting GoPro videos to Premiere Pro CC 2015.3

Click "Convert" button to start transcoding Gopro videos to MPG/MOV/WMV for Adobe Premiere Pro. When the conversion task is finished, you can get the exported files by click the "Open" button for importing to Adobe Premiere Pro CC 2015.3 to do further editing on Mac.

Read More: 

Friday, August 5, 2016

Cannot Open Canon 1D X Mark II videos in FCP X/7/6?

The EOS-1D X Mark II is Canon’s newest flagship DSLR aimed at pro-level photographers. A quick glance reveals the camera’s 1D-series heritage, but under the hood there are some exciting upgrades going on. The 1D X II is built around a new 20.2MP full-frame CMOS sensor, now with Canon’s Dual Pixel autofocus system, includes an expanded 61-point autofocus system with 24% more coverage and a 360,000-pixel RGB+IR metering sensor, and is one of the first Canon DSLRs (other than the somewhat niche 1D C) that captures 4K video.

However, the problem that filmmaker considered is that how to make these outstanding 4K videos from Canon EOS-1D X Mark II into Final Cut Pro for editing smoothly. Now this article will offer you tips and tricks for importing Canon EOS-1D X Mark II 4K MOV and MP4 to FCP X/7/6.

Actually, the 4K MOV and MP4 video were restricted to edit in Final Cut Pro. Only the latest version FCP can natively support 4K video like Canon's MOV or MP4 footage. But, due to the format limit, we can't play Canon EOS-1D X Mark II footage (MPEG4 AVC/H.264; Audio: Linear PCM) in the editing software smoothly, and we spend long time on rendering videos. How to solve the issues? As mentioned above, we need to encode 4K to FCP compatible video. What you need is a Canon Video Converter application.

Pavtube HD Video Converter for Mac is the ideal Canon 4K file converter for you, which can take your high quality Canon EOS-1D X Mark II 4K files and convert them into a supported format like Apple ProRes MOV for editing in Final Cut Pro any version(FCP X/7/6). Besides FCP, this software can also export professional encoders like MPEG-2 for Adobe Premier Pro and more. This 4K video converter is also available to customize the output resolutions to any size like 1080p, 2K, 4K as the users want for uploading to Youtube/Vimeo/Facebook etc. (read review)

For Windows users, Pavtube HD Video Converter is the alternative choice. Just download it and follow the tutorial below to get the work done.


Other Download:
How to Convert Canon 1D X Mark II videos to FCP X/7/6 supported Apple ProRes?

Step 1. Click "Add video" button to add your Canon 1D X Mark II video files to the program. Or directly drag the video you want to convert to the left item bar.


Step 2. Go to "Format" bar and choose "Final Cut Pro > Apple ProRes 422 (*.mov)" as output format for Final Cut Pro X/7/6.


Tips: The default settings may not satisfy you, and you can click the "Settings" button to change the settings by yourself including video resolution, bit rate, audio sample rate, audio channel etc. for full screen playback smoothly. Or keep no changes, which is also a good choice.

Step 3. Click the "Convert" button on the main interface and the software will start to convert Canon 1D X Mark II to FCP friendly video formats immediately. When the conversion finishes, click "Open" to find the converted video files. Then you can effortless transfer the video files to FCP X or FCP 6/7 for easily editing.

Note: If you are also a FCP X user, before you try to do the conversion, don't forget to make sure that you have installed the Apple ProRes Codec manually since the FCP X asks users to install it by themselves.

Editor's Recommendations

Tuesday, August 2, 2016

Import and Edit Pentax K-70 60i/50i MOV/MP4 with Adobe Premiere

About Pentax K-70 video

The Pentax K-70 captures high-resolution, flawless Full HD movie clips (1920 x 1080 pixels; 60i/30p frame rate) in the H.264 recording format. In combination with compatible lenses, it allows the user to use the Continuous AF (AF-C) mode to keep accurate focus on a moving subject, or take advantage of a new aperture control function to automatically assure a proper exposure level even in fluctuating lighting conditions during movie recording.

Can I import Pentax K-70 video to Adobe Premiere?

Although Adobe Premiere Pro is compatible with MP4, MOV file format, a compressed output MPEG-4 AVC/H.264 MP4/MOV from Pentax K-70 is not ideal for editing. To solve those problems, the quick workaround is to transcode Pentax K-70 MP4/MOV files to Adobe Premiere natively supported formats.

How to Solve can’t import Pentax K-70 MOV/MP4 to Adobe Premiere?

So along with some help from third-party software, it can be done effortlessly. In fact, that is easy. Pavtube Video Converter for Mac is the best Mac Video Converter for Pentax K-70 footage, which will create an Adobe Premiere (Adobe Premiere Pro CC, Premiere Pro CS6/5/4/3, Adobe After Effects CC, After Effects CS6, Adobe Premiere Elements 13/12, Adobe Creative Suite 6/5) friendly file format - MPEG-2 keeping the original quality in OS X Yosemite, Mavericks, Mountain Lion and more. Besides Premiere, this software can also export professional encoders like DNxHD for Avid, ProRes for Final Cut Pro 6/7/X, AIC MOV for iMovie, MPEG-2 for DaVinci Resolve, WMV for Windows Movie Maker and more. Just with the program, you can edit Pentax K-70 in FCP/Premiere/Avid smoothly. For Windows users, Pavtube Video Converter is the alternative choice. Just download it and follow the tutorial below to get the work done.

Hot search: Pentax K-70 MP4/MOV video to FCP X | AVI to Adobe Premiere Pro | XAVC S to Adobe Premiere | MKV to Adobe Premiere | XAVC to Adobe Premiere 

Download and get the Pentax K-70 video to Adobe Premiere converter:


Other Download:
- Pavtube old official address: http://www.pavtube.com/video_converter/
- Amazon Download: http://download.cnet.com/Pavtube-Video-Converter/3000-2194_4-75734821.html
- Cnet Download: http://download.cnet.com/Pavtube-Video-Converter/3000-2194_4-75734821.html

Follow the 3 steps to convert the Pentax K-70 60i/50i MOV/MP4 to Adobe Premiere format

Step 1: Add Pentax K-70 videos

Install and launch the Premiere Video Converter, and then click "Add Files" button to import your Pentax K-70 clips to the software.


Step 2: Choose output format

Click "Format" pull down list to select Adobe Premiere/Sony Vegas> MPEG-2(*.mpg) as the best video format for Premiere Pro. WMV, MOV formats are the good choice as well.


Tip: Click Settings to customize audio and video parameters Video Codec, bit rate, frame rate, Audio codec, sample rate, audio channels.

Step 3: Convert Pentax K-70 files

Click the " Convert" button under the preview window; the converter will start encoding Pentax K-70 MP4/MOV for importing to Premiere. Soon after the conversion is finished, just click "Open" button to get the converted Pentax K-70 footage for editing in Adobe Premiere perfectly.

Read More: