Thursday, September 8, 2016

Change 720p to 1080p or 1080p to 720p with Original Quality on Mac

Why convert 720P to 1080P?

For more delicate, more realistic, better version experience, you have to convert 720P to 1080P for your TV. If your TV supports 3D playback, you can convert 720P to 3D 1080P for 3D TV. So, you can watch 2D movies on TV in 3D. The most imporant, TV can’t support all formats playback. Or you need upsacling 720p to HD 1080p for other usages.

Why We Need to Convert 1080p to 720p Video?

Reason 1 : Downsize Videos from full HD 1080p to 720p to Save Space
Reason 2: Convert 1080p to 720p for YouTube Uploading/E-mailing Faster & Easier
Reason 3: Convert video from 1080p to 720p for Better Compatibility (esp. for mobile devices)


How to Convert 720p to 1080p with Best HD 1080P Video Converter?

If you need adjust 720p to 1080p, you can adopt Pavtube Video Converter for Mac. With it, you can convert720P MKV/AVI/MOV/WMV/M4V to 1080P/3D 1080P for all player/HDTV(Samsung/Sony/Sharp/LG/Panasonic/Vizio/Philips TV etc).

How to Convert 1080p to 720p with Best HD 1080P Video Converter?

Now you may understand why you need to downscale and convert 1080p to 720p and wonder how to convert 1080p to 720p on Mac. The answer to this is simple: 1080p to 720p converter for mac. Here we highly recommend Pavtube Video Converter for Mac. This HD 1080P video converter for Mac features the strong ability to convert 1080P to 720P, 4K Ultra HD to 1080P/720P, formatted with MP4, MOV, FLV, AVI, MKV, WMV, 3GP, SWF, etc, and also compress videos to iPhone, iPad, Samsung and other portable devices with suitable file size and 1:1 intact quality.

* HD 1080P &720P Converter Compressor*
Best-ever 4K, 1080P, 720P converter can easily compress and convert between 1080P and 720P video with smaller file size and 1:1 lossless quality.

  • Convert 720p to 1080p, 1080p to 720p, convert 1080p to 4K, 4K to 1080p among any formats 
  • Convert 350+ Preset Profiles for Apple and Android Devices: iPhone 6S/6S Plus/6/6 Plus, iPad Air 2, iPad Mini 3/4, QuickTime, Apple TV 4/3/2/1, HD TV etc. 
  • Basic 1080P/720P video editing functions: split, merge, trim, crop, add watermark, adjust video effect, edit audio and insert subtitles. 
  • Allow you to complete the conversion process with three simple clicks. 
  • Support all Mac systerms : macOS Sierra, El Capitan Yosemite, Mavericks, Lion etc.


>> Windows user get - Pavtube Video Converter.

How to Change 720p to 1080p or 1080p to 720p with Original Quality on Mac

Step 1: Click “Add Files” to import vide/720P video into 720P to 1080P converter.


Step 2: Choose an output format. Here are many formats available such as MP4, MOV, AVI, FLV, WMV etc. Generally, MP4 is high recommended as it's a format widely used with relatively high quality. (Tips: You can also select to convert 1080p720p files to the mobile devices you want like iPhone 7/SE/6S/6S Plus/6/6 Plus/5S/5C/4/4S, iPad Air, HTC One M9, Samsung, TV etc.)


Step 3: Set the 1080p to 720p/Set the 720p to 720p

After you choose the output format, just go to the settings to modify the resolution according to your needs. You can customize 1080p video size to “1280*720” or adjust 720p video to 1920*1080. (If you need creat e 4K, you can adjust video to 3840*2160, or select/write any resolution in “size”)


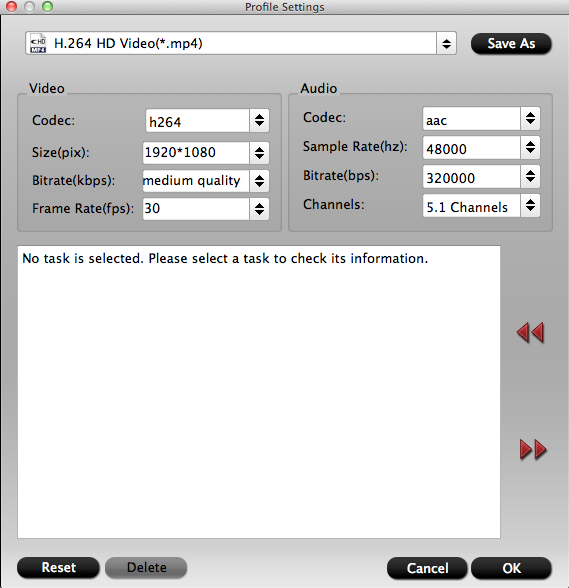
Many other advanced parameters like Bit Rate, Video Codec, Channel etc are also available for you to further customize your output file.

Step 4. Start converting 720p to 1080p/1080p to 720p

Once you’re sure all the settings is OK, click the “Convert” button to start converting 720p to 1080p/1080p to 720p on your Mac. When the conversion completes, click “Open” button to locate the 1080p/720 videos. Now yo can do a lot the image and retain detail for a beautiful 1080p finish with highest quality and makes your computer run faster during your edit/grading/playback/uploading process.


Other Download:
- Pavtube old official address: http://www.pavtube.com/video-converter-mac/
- Cnet Download: http://download.cnet.com/Pavtube-Video-Converter/3000-2194_4-76179460.html
- Top4download.com: http://www.top4download.com/pavtube-video-converter-for-mac/iujpttsg.html


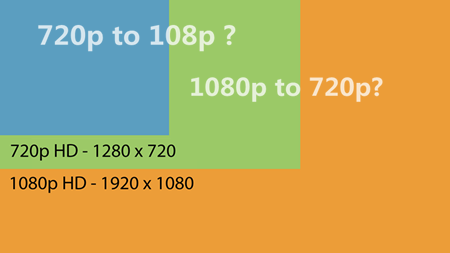
PS: 1080P vs 720P: Difference Between 1080p and 720p 

720p is a progressive HDTV signal format characterized by 720 horizontal lines, implying a resolution of 1280x720.

1080p, also called Full HD, often available in Blu-ray Disc, HD camcorders and cameras, video game consoles etc, is the set of HDTV high-definition video modes with 1080 horizontal lines, yielding a resolution of 1920x1080.

Read More: 

Monday, September 5, 2016

Editing Sony A6000 AVCHD MTS in Pluraleyes 4/3.5/3

The Sony A6000 features the same basic set of Full HD video recording features including 1,920 x 1,080 resolution video with 60p, 60i and 24p frame rate options in AVCHD format along with lower resolutions in MP4 format, and provides support for full PASM exposure modes. The dedicated video recording button allows for motion picture capture in any exposure mode for quick, one-press video recording, although there is a dedicated Movie Mode. Lokk at the recording files:

Recording movie file: 

Video Mode : AVCHD: PS - 1920x1080/60p @28Mbps FX - 1920x1080/60i @24Mbps FH - 1920x1080/60i @17Mbps FX - 1920x1080/24p @24Mbps FH - 1920x1080/24p @17Mbps MP4: HD - 1440x1080/30fps @12Mbps, VGA - 640x480/30fps @3Mbps
Video Format : AVCHD Ver. 2.0 / MP4 (MPEG-4 AVC (H.264))
Audio Format : Dolby Digital (AC-3) / MP4: MPEG-4 AAC-LC, 2ch

Sony A6000 AVCHD MTS Converter for Pluraleyes

Pavtube MTS/M2TS Converter for Mac is the best application for you to convert/import Sony Alpha a6000 AVCHD to Pluraleyes (Pluraleyes 4/3.5/3). Alpha a6000 to Pluraleyes Converter is the best AVCHD to Pluraleyes Converter. With the help of the powerful Sony Alpha a6000 Video Converter, you can convert Sony Alpha camera AVCHD to Pluraleyes easily and quickly for personal editing and then share with your families. (Supported Cameras: all Sony Alpha series, all Sony cameras.) Read the best MTS converter review.

Besides, for editing Sony Alpha a6000 video in Premiere, Windows Movie Maker, Sony Vegas, Final Cut Express, Avid... you can use same way to convert Sony Alpha recordings to your editing software compatible videos via the best Sony Alpha a6000 tp FCP converter. What’s more, this powerful converter also can convert AVCHD/MTS footage to common video format for any deviceslike Windows Media Player, QuickTime, VLC, TV etc.

Hot search: MXF to Pluraleyes ǀ MTS to Pluraleyes ǀ Snoy XAVC S to Pluraleyes 

Windows version - Pavtube MTS/M2TS Converter

Free download the MTS to Pluraleyes converter:


Other Download:
- Pavtube old official address: http://www.pavtube.com/mts-converter-mac/
- Cnet Download: http://download.cnet.com/Pavtube-MTS-M2TS-Converter/3000-2194_4-76177029.html

Step-by-step Guide: How to convert Sony A6000 AVCHD MTS to for syncing in PluralEyes

Step 1: Import Sony A6000 AVCHD MTS clips

After installing, run the MTS converter. And then click "Add" to locate and load your MTS files. You can also directly drag and drop your MTS videos to the program.


Note: Batch conversion is supported, so you can load more than one file to save time.

Step 2: Choose a target format

Choose a proper output format for PluralEyes by clicking the Format bar. For those who work with MTS files in PluralEyes on Mac, move mouse cursor to "Final Cut Pro" and select > Apple ProRes 422 (*.mov)" as output format. Note: If you are using MTS clips in PluralEyes on Windows PC, WMV is the optimal choice.


Tips: Edit Sony A6000 AVCHD MTS files in the following aspects:

Cut video files to capture your favorite clips
Crop video files to remove the black edges around your movie video
Rotate video files 90 Degrees, 180 Degrees, etc
Adjust video image in brightness, contrast and saturation
Add watermark/subtitle to video files
Remove/Replace audio from video clips

Step 3: Start AVCHD MTS to Pluraleyes conversion

Finally, click "Convert" button and your MTS files will be converted into ProRes .MOV or WMV ready to be imported into PluralEyes.

Once the conversion is finished you can click "Open" button to get the output files effortlessly, and now you are ready to import and sync MTS/M2TS files with PluralEyes 4/3.5/3 seamless.

Read More: 
Related Software: 
Professional HD Video converter for converting HD Videos on Mac, provides the perfect solution to convert HD video to any HD/SD video format like AVCHD MTS/M2TS/TS, H.265, AVI, MOV, MP4, MPEG, FLV, MKV, WebM, M4V, etc. and vice versa on Mac. Running perfectly on Mac OS X Snow Leopard/Lion/Mountain Lion/Mavericks/Yosemite/El Capitan/macOS Sierra.
It is blazing professional video conversion software, enabling you to convert any video formats like H.265, MP4, MOV, MTS, M2TS, TS, MPEG, FLV, AVI, MKV and more 300+ formats or YouTube/Vimeo/Facebook video, to 4K/HD 1080P video. It possesses high compatibility with portable iPhone, iPad, Apple TV, QuickTime, etc.

Thursday, September 1, 2016

Two Ways to Merge and Edit CamRec MTS/M2TS Videos in Camtasia Studio

When we want to edit our HD camcorder recorded videos in the file extensions of M2TS or M2TS through Camtasia, it fails. Why? Because Camtasia and many other video editing programs do not support MTS/M2TS format as the input.

In order to make a highlight video out of camera recorded M2TS/MTS video files, we have to turn to a HD MTS/M2TS video converter or codec for help. Here we recommend Pavtube MTS/M2TS Converter for Mac which is not only able to convert M2TS/MTS to Camtasia videos, but also edit all kinds of videos. Therefore, you have two options to edit HD-camera recorded videos.

Solution 1: Convert MTS/M2TS to Camtasia Studios supported format

Solution 2: Find a Camtasia Alternative to Import/Edit/Merge MTS/M2TS Videos

Luckily, you needn’t choose two tools to help you done. Pavtube MTS/M2TS Converter for Mac can not only convert MTS/M2TS to Camtasia Studios supported format, but also can be the best Camtasia Alternative to Import/Edit/Merge MTS/M2TS Videos. That’e perfect. (Read Review)

Read Also: OBS MP4 to Camtasia Studio ǀ Canon MXF to Camtasia Studio ǀ TS to Camtasia Studio ǀ AVCHD MTS/M2TS to Camtasia 2 ǀ MKV to Camtasia Studio 

Free download the best MTS/M2TS to Camtasia Studio converter/editor:


Other Download:
- Pavtube old official address: http://www.pavtube.com/mts-converter-mac/
- Cnet Download: http://download.cnet.com/Pavtube-MTS-M2TS-Converter/3000-2194_4-76177029.html

Follow the guide to merge and edit CamRec MTS/M2TS Videos in Camtasia Studio nicely

1. Add MTS/M2TS files

After you run this MTS/M2TS merger/converter, click "Import" option to load all of your local MTS/M2TS files to join together. After that, they will be listed on the User’s album of this app. Or you may directly drag them to the User's Album from your computer.


2. Merge and edit CamRec MTS/M2TS Videos

Merge selected files into one: By ticking off “Merge into one file” option behind “Settings” button, you can merge the MTS/M2TS files in list into one single file.


Other editing funtions:

Go to “Edit” tab and open “Crop” “Effect” “Watermark” “Audio” tab to adjust video zoom, adjust image brightness, and add watermark etc:

  • Cut video files to capture your favorite MTS/M2TS clips. 
  • Crop video files to remove the black edges around your MTS/M2TS video 
  • Go to “Setting” tab to adjust video bitrate/codec/resolution and more. 
  • Adjust video image in brightness, contrast and saturation 
  • Add watermark/subtitle to MTS/M2TS video files 
  • Remove/Replace audio from MTS/M2TS video clips 
3. Choose output format for Camtasia Studio

Click Format to choose “Common Video -> MOV – QuickTime (*.mov)” profile in the drop-down menu.


4. Convert CamRec MTS/M2TS Videos to Camtasia Studio

Simply click the "Convert" button to start converting and everything else will be automated. If you have added quite a bunch of video files, it would take some time to convert. In such case, you can click Option and tick the box “Shut down the computer after conversion”.

Read More: 

Monday, August 29, 2016

How to Merge and Upload Convert GoPro 4K videos to Instagram?

Instagram is a popular photo sharing network that allows user to easily shot, upload and share personal images through social media. But now it is also a place that you can upload and share short videos up to 60 seconds long. Try to upload GoPro 4K video to instagram but video not uploaded? That's because the Instagram video limits. Wheras an Instagram video converter could solve all by converting Instagram video to MP4/H.264 etc.

Instagram Supported Video Detailed Specifications: 

  • Size: maximum width 1080 pixels (any height) 
  • Frame Rate: 29.96 frames per second 
  • Codec: H.264 codec / MP4 
  • Bit rate: 3,500 kbps video bitrate 
  • Audio: AAC audio codec at 44.1 kHz mono 
  • Length: 60 seconds 
  • Filesize: 15MB 
So you can choose a best converter and editor for Instagram. Pavtube Video Converter can done well. It is not only a converter, also a editor. With it, you can easily convert, merge, upload GoPro 4K videos to Instagram best format for for Instagram and adjust Instagram video parameters with originally quality reserved. Besides, professional editing functions are provided to you: split, merge, trim, crop, add watermark, adjust video effect, edit audio and insert subtitles etc.

Hot search: SD/HD/4K to Instagram ǀ DJI Phantom 4 4K to Instagram ǀ how to manage GoPro 4k Videos ǀ convert GoPro Camera 4K video to any format

Mac version - Pavtube Video Converter for Mac

Download the best GoPro 4K videos to Instagram converter and editor


Other Download:
- Pavtube old official address: http://www.pavtube.com/video_converter/
- Cnet Download: http://download.cnet.com/Pavtube-Video-Converter/3000-2194_4-75734821.html

How to Convert, merge, upload GoPro 4K videos to Instagram?

1. Add GoPro 4K Files

Click "Add video" to add AVI files from the PC local to the program, or drage and drop the GoPro 4K videos to the converter.


Step 2. Click "Format" bar, and select .mp4 from "Common video" for Instagram


Step 3: GoPro 4K videos to Instagram MP4 format

  • Go to “Merge into one File” tab to merge several GoPro 4K files into single one for Instagram. 
  • Go to “Edit” tab and open “Crop” “Effect” “Watermark” “Audio” tab to adjust video zoom, adjust image brightness, and add watermark etc. with GoPro 4K to InstagramConverter. 
  • Go to “Setting” tab to adjust video bitrate/codec/resolution and more. 

Step 3. Click the "Convert" button on the main interface and the software will start to convert 4K to Instagram friendly video formats immediately. When the conversion finishes, click "Open" to find the converted video files. Then you can effortless transfer the video files to Instagram for uploading and sharing.

Read More: 

Thursday, August 25, 2016

Vizio TV will not play some MP4 videos? Solved!

Why Encounter Failure When Playing MP4 Video in Vizio TV?

Vizio TV is very popular, it gives you instant access to a world of movies, TV shows, music, Vizio Smart TV gives you more of what you love about TV with all the brilliant picture quality and world-class service you’d expect, but the transferred video files must be in the video formats supported by Vizio TV. Many video formats are not well supported by Vizio TV due to the codecs. For example, MP4 is a container format which supports so many different codecs, you will encounter playback problems with these unsupported video formats.


How to Solve Can't Play MP4 Video in Vizio TV?

Here in order to help you to play MP4 on Vizio LED TV & Vizio 4K TV from USB smoothly, we will share the best MP4 to Vizio TV converter with you, which will help you to convert MP4 files to Vizio TV supported video format, and then you can play converted videos on Vizio TV via USB.

Introduction of Pavtube Video Converter- Vizio TV MP4 Converter

A good video converter will help you to convert videos at fast speed with top quality, now we want to share the best MP4 to Vizio TV converter with you, the program is called Acrok Video Converter Ultimate, it is a powerful program, it can convert MP4 files as well as other HD videos like MKV, AVI, H.265, Tivo etc to the video format you need, such as Vizio TV supported H.264 MP4 format, or optimized formats for smartphones, tablets, editing programs and HDTVs. It is compatible with Windows 10, Windows 8.1, Windows 8, Windows 7, Windows XP. (read review)

Hot search: MP4 to LG TV ǀ MP4 to Sony TV ǀ MP4 to Samsung TV ǀ MP4 to WD TV ǀ MP4 to Apple TV 4 

Mac version - Pavtube Video Converter for Mac

How to Transcode MP4 to Vizio TV with Pavtube Video Converter?

Step 1. Make Preparation: Free download MP4 to Vizio TV Converter


Other Download:
- Pavtube old official address: http://www.pavtube.com/video_converter/
- Cnet Download: http://download.cnet.com/Pavtube-Video-Converter/3000-2194_4-75734821.html

Step 2. Import MP4 video

Click "Add file" button to add MP4 video to the program. You can also use dragging and dropping function and batch conversion function to add many MP4 files.


Step 3. Choose the right videos as output file format.

Click the “Format” bar, from its drop-down list, select Vizio TV supported video codec from “HD Video” > “H.264 HD Video(*.mp4)”.


Tips : Click “Settings” on the main interface to open “Profile Settings” window, click “audio codec” drop-down list, select AAC as the output audio codec for Vizio TV.

Step 4. Click the "Convert" button on the main interface and the software will start to convert MP4 to Vizio TV friendly video formats immediately. When the conversion finishes, click "Open" to find the converted video files. Then you can effortless transfer the video files to Vizio TV for playback on the go.

Read More:

Tuesday, August 23, 2016

Can I add a Tivo codec to Premiere Elements?

When importing a TiVo file, Adobe Premiere Elements would return the error "File Format not Supported" or other error message.

“Is anyone here using Premiere Elements to edit TiVo files? If so, how are you doing it? I’d like to be able to import several TiVo files into Premiere and edit it. Anyone doing such a thing? What’s your workflow? Thanks for any replies.”

The reason the file is not supported is because only a handful of programs currently support .tivo files in their native format, which is MPEG-2 based, but in what someone described as being in a ".tivo wrapper." You will need a program that will work with it in that form, or else removes it so that it will be recognizable by other video software.

An easy-to-use yet professional app Pavtube HD Video Converter for Mac (read review) which can be used as a Mac TiVo to Premiere Elements Converter under macOS Sierra, Mac OS X 10.11 El Capitan, Mac OS X 10.10 Yosemite, 10.9 Mavericks, 10.8 Mountain Lion, 10.7 Lion, 10.6 Snow Leopard, 10.5 Leopard.

With it, you can effortlessly transcode TiVo shows to MPEG-2 video for Adobe Premiere Elements and Premiere Pro CS3/CS4/CS5/CS6/CC, and it works well and converts flawlessly. Meanwhile, the Mac Video Conversion tool can create files compatible with various non-linear editing systems like Avid, FCE, FCP, iMovie, and DaVinci Resolve, etc. For encoding TiVo to Premiere Elements friendly video on Windows, try Pavtube HD Video Converter. Below is how.

Hot search: MXF to Premiere Elements ǀ AVI to Premiere Elements ǀ MP4 to Premiere Elements ǀ 4K XAVC S to Premiere Elements 


Other Download:
Convert Tivo video to Premiere Elements best editable format on Mac

1: Load TiVo files to the program

Start up this TiVo converter program, and then click “Add” to import all .tivo files.


Tip: When first loading, this Mac TiVo Converter will ask you to input your Media Access Key. Simply enter your Media Access Key, and click "OK" to confirm.

2: Choose output profile for Premiere Elements

Select “Format” pull down list to select Adobe Premiere/Sony Vegas> MPEG-2(*.mpg) as the best video format for Premiere Elements.


Tips: You can click “settings” button in the main interface to customize the output video’s parameters, such as resolution, frame rate, etc.

3: Start TiVo to Adobe Premiere Elements conversion

Click the big "Convert" button at the bottom right corner, this Mac video converter will start to convert TiVo to .MPG for Premiere Elements! Once the conversion completes, you are free to use TiVo files in Premiere Elements.

Read More: 

Thursday, August 18, 2016

Adjust Olympus TG-Tracker 4K H.264 MOV to FCP X/7

The Tough TG-Tracker is the latest rugged waterproof action camera from Olympus. The TG Tracker is equipped with a 1/2.3in sensor which can capture 4k video - indeed the sensor itself matches the 16:9 widescreen shape and 3840x2160 pixels of 4k video. The Olympus TG-Tracker can record MOV/H.264 with linear PCM stereo sound video with 4K resolution. The 1080p MOV videos can achieve high quality video in relatively low bitrates. However, this HD video format also causes problem, for example, importing Olympus TG-Tracker 4K H.264 MOV to FCP X/7 for editing.

Tough Final Cut Pro announced it supports MOV for input, the 4K HD video from Canon/Nikon is not compatible with FCP. If you have got 4K H.264 MOV files from Olympus TG-Tracker and suffered the headache from importing and editing these files in FCP, Pavtube HD Video Converter for Mac will get you out of the trouble. This MOV to ProRes Converter offers the best practice to convert MOV to ]FCP highly compatible format - Apple ProRes within few clicks on Mac. (read review)

Key Features of Pavtube HD Video Converter for Mac:

  • Convert all formats including XAVC, XAVC S, XAVC L, H.265, MOV, MP4MKV etc to FCP X/FCP 7. 
  • Custom Video: Personalize videos with diversified video editing tools. 
  • Optimized Presets: Allows you to optimize the output the way you want. 
  • Extract Audio: Extract audio from video to MP3, M4A, AAC, AIFF, WAV, WMA, etc. 
  • Supported OS: It can be compatible with macOS Sierra, Mac OS X 10.11 El Capitan, 10.10 Yosemite, 10.9 Mavericks, 10.8 Mountain Lion, 10.7 Lion and 10.6 Snow Leopard. 
>>>Windows version - Pavtube HD Video Converter

Download and get the best FCP Video Converter:


Other Download:

Convert Olympus TG-Tracker 4K H.264 MOV to FCP X/7 ProRes on Mac

Step 1. Add Olympus TG-Tracker video clips

Install the program on Mac and run it. Drag the 4K .mov files from Olympus Tough TG-Tracker to the software. It supports batch conversion and joining multiple video clips into one file.


Step 2. Choose ProRes as output format

Click the “Format” bar and select Final Cut Pro> Apple PreRes 422(*.mov) as output format. (Kindly Note: Apple ProRes 422 (HQ) have higher qualities. Apple ProRes 422 (LT) and Apple ProRes 422 (Proxy) have smaller sizes. You can choose according to your requirement)


Step 3: Start Olympus TG-Tracker 4K to ProRes conversion

Click the "Convert" button at the bottom right corner to start transcoding 4K H.264 MOV files for FCP. It does Olympus TG-Tracker 4K H.264 MOV to FCP video conversion like a charm and the output files will maximally preserve the quality of your original Olympus TG-Tracker 4K H.264 MOV clips. After conversion, you can import converted video clips into Final Cut Pro X/ or FCP 7 to create the end results that you want.

Additional Tips: If you are also a FCP X user, before you try to do the conversion, don't forget to make sure that you have installed the Apple ProRes Codec manually since the FCP X asks users to install it by themselves.

Read More: