If you wanna make the iMovie exported movies save in MP4 in order to edit or playback well on Mac OS X, you come to the right place! Especially for solving the iMovie to MP4 issues, we here can offer you two efficient ways to import iMovie files to Mac in MP4 format. Just follow the steps.

Method 1.Convert iMovie to MP4 for Mac OS X QuickTime
Firstly, we are going to teach you how to transfer iMovie videos to MP4 via using the features of iMovie itself---QuickTime item. Follow the steps to learn the instructions on converting iMovie to MP4 nicely on Mac OS X.
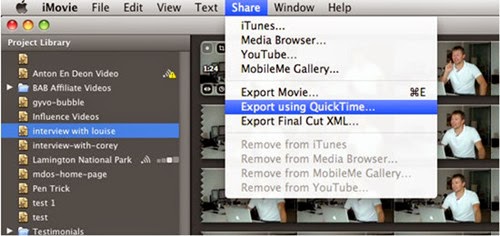
Launch the iMovie and get into the main interface. Click "Share > Export using QuickTime" at the top menu bar.
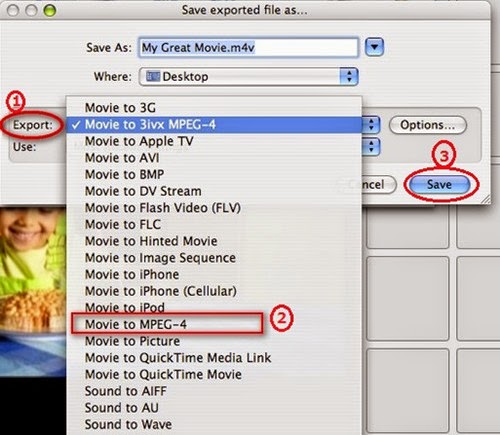
Then a window named "Save exported file as…" pops up. Click "Export" option and find "Movie to MPEG-4" in the drop-down menu. If you need to make some settings to the file video format, you can click Settings button; if not, directly hit on "Save" button to export a mp4 file from iMovie.
Method 2. Pavtube Video Converter for Mac---Easily convert iMovie to MP4 for Mac OS X.
In this way, if the exported files still cannot recognized by your devices or are rejected by the video sharing websites, we here highly suggest you to use this professional iMovie to MP4 Converter on Mac. It can convert iMovie to MP4 in HD, as well as AVI, WMV, etc. so that you can watch them on Windows computer, android devices, and more. What’s more, this program can also works well with different videos from other NLEs like FCP, Premiere Pro, etc. Let’s together see how to convert iMovie to MP4 for Mac OS X.
Steps on converting iMovie videos to MP4 on Mac OS X:
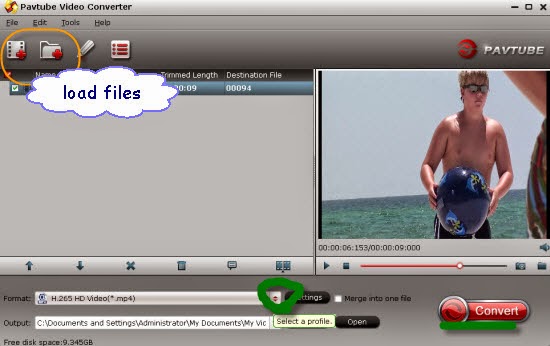
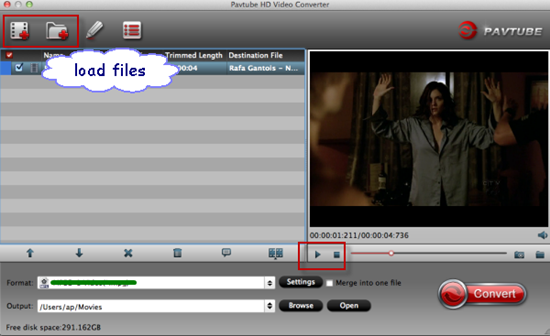
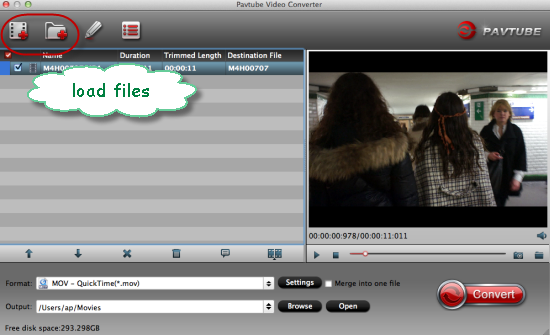
Step 1.Click on Add button and go to the folder to find the videos that you want to convert to MP4 as soon as you open the main interface. Here you can import multiple videos.
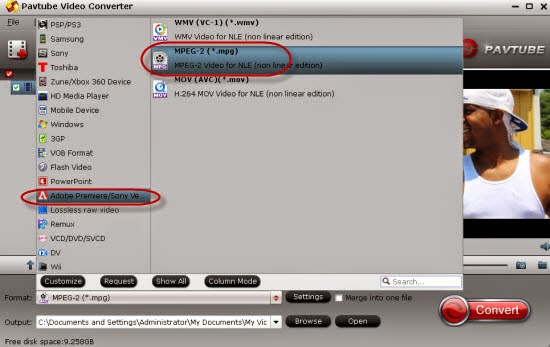
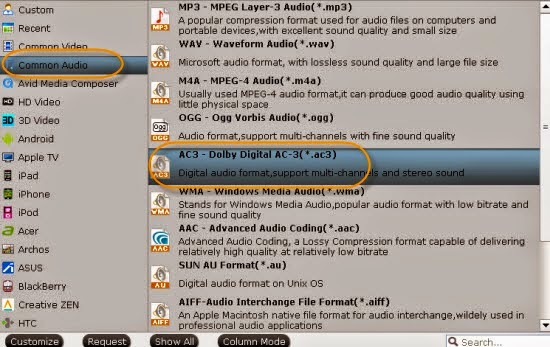
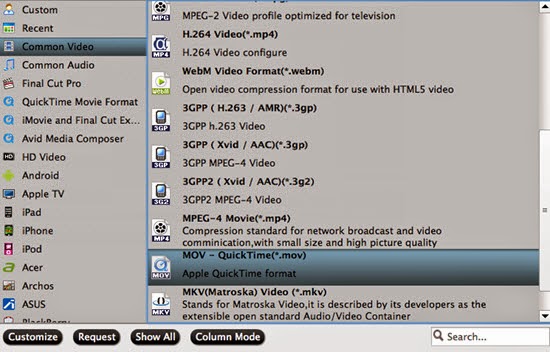
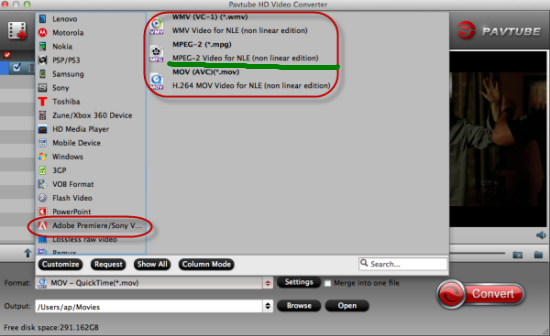
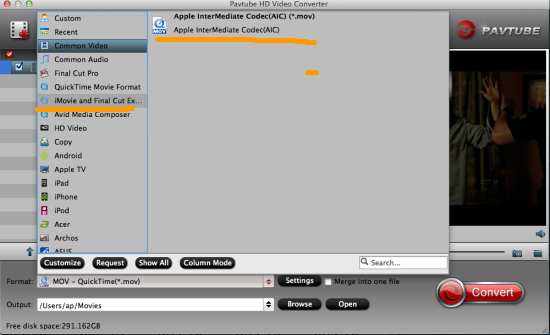
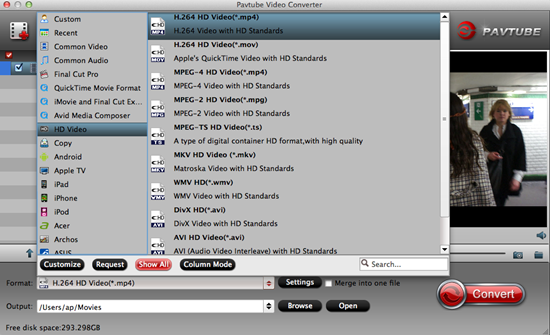
Step 2. When you come to the output list, just drop down the list and select the ‘HD Video’>>’H.264 HD Video (*.mp4)’ as the best output one with the high quality preserved. Or in the common column, you can also find the similar one.
For advanced functions?
Click the “Effect” button to open the Video Edit window to achieve editing MP4 like trim, crop, image, watermark, effect, subtitles and rotate and etc in the corresponding editing pane.
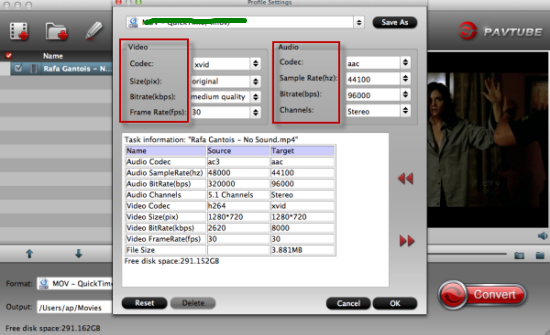
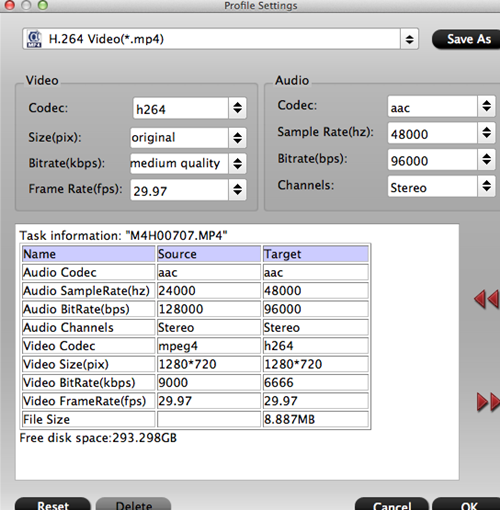
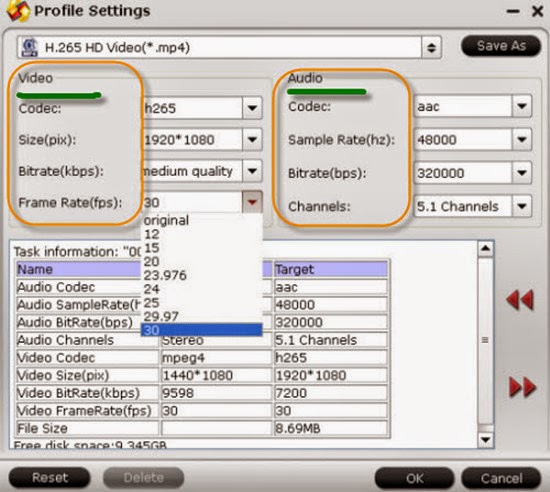
Click the “Setting…” button to open the Advanced Settings window to adjust the output video codec, resolution, bitrates, frame rate, aspect ratio, audio codec, channel, volume and etc in the advanced tab.
Finally, when specifying the output format, you can click on the ‘Convert’ button on the main interface to finish the conversion. With the high conversion speed and easy operation job, it would not be hard for us to load iMovie videos to Mac OS X in MP4 format.
Conclusion: Above are two best solutions to how to save and convert iMovie to MP4 file. In general, you can use the first way to achieve it. But if the first way can't meet your need, the software introduced in the 2nd part can help you as well. Let’s just have a try!
Further Reading: