For Mac users who have just shot some UHD 4K XAVC S video with Sony's newly released FDR-AX700 4K HDR camcorder, you can create hollywood-style trailers and stunning movies with the free but professional NLE editing software - iMovie offered by Apple. But how about the workflow of FDR-AX700 4K XAVC S format with iMovie?
Media compatibility of FDR-AX700 4K XAVC S with iMovie
It is well known that Apple has updated iMovie 10.1 for Mac with support for 4K editing. In addition, you will also be able to load XAVC S media from your Sony camera to iMovie for Mac. Although some XVAC S footage will appear blank or black when it is shot at 100fps or 120fps, however, you can easily fix that by updating your iMovie to the 10.1 version or later from the Update pane of the Mac App Store and then reimport the same clips from your camera as part of a new event.
Work Sony FDR-AX700 4K XAVC S with iMovie on slow Mac computer
Although you can directly import Sony FDR-AX700 4K XAVC S to iMovie with no resolution or format incompatibility issue. However, there are still another important issue we should take into consideration: how about when you are running a slow Mac computer.
Unlike FCP X or Premiere Pro CC, iMovie lacks the ability create compatible Proxy file with smaller file resolution to enhance the playback performance in iMovie. Therefore, you will inevitably encounter video stutters or lagging issue when playback 4K video with iMovie on slow Mac computer. Are there any other workable solution to fix this annoying issue?
Related article: Edit Sony FDR-AX700 4K XAVC S with FCP X
Compress FDR-AX700 4K XAVC S to 1080p for iMovie smooth editing
The good news is that you can downscale 4K video to 1080p with some 4K Video Compressor. The application we highly recommend to you here is called Pavtube Video Converter for Mac. The application has perfect importing support for the 4K XAVC S video shot with Sony FDR-AX700. Thanks to its batch conversion mode, you can load multiple video into the application at one time for conversion to save your precious time.
With this remarkable application, you can efficiently compress FDR-AX700 4K video to iMovie compatible file formats such as MPEG-4, MPEG-2, QuickTime MOV, DV & HDV, etc. For those people who want to get a high performance and high quality and less processor intensive workflow with iMovie, we highly recommend you to encode 4K XAVC S to iMovie most favorable Apple Intermediate Codec with our application.
Pavtube Video Converter for Mac is available to install and download on macOS High Sierra, macOS Sierra, Mac OS X El Capitan, Mac OS X Yosemite and Mac OS X Mavericks. The program also offers some beneficial video editing functions for you to trim video length, crop video black borders, add transparent watermark, insert external srt/ass/ssa subtitle, etc.


Step by Step to Compress and Transcode FDR-AX700 4K XAVC S to 1080p AIC for iMovie Editing
Step 1: Load Sony FDR-AX700 4K video.
From "File" drop-down option, select "add Video/Audio"to add Sony FDR-AX700 4K XAVC S video files into the program.

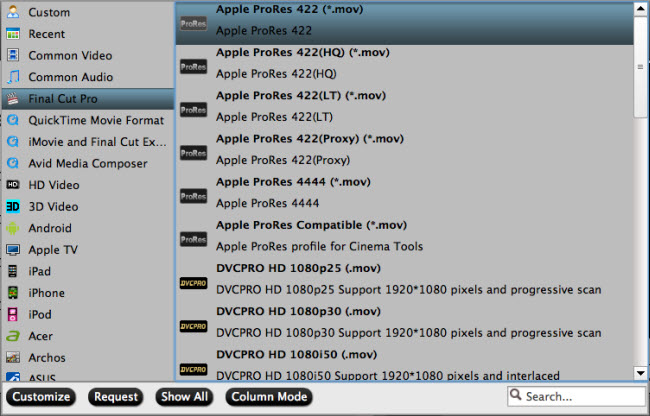
Step 2: Choose output file format.
From "Format" drop-down option, choose iMovie high quality and high performance editing codec by selecting "iMovie and Final Cut Ex..." > "Apple Intermediate Codec (AIC)(*.mov).

Tips: Click "Settings" on the main interface to open "Profile Settings" window, in video section, from "Size(pix)" drop-down list, choose "1980*1020" or "1080*720" to compress 4K to 1080p or 720p for smooth workflow in iMovie.
Step 3: Edit Sony FDR-AX700 4K video.
By default the Edit icon is grayed out. To activate the Edit menu, you have to select an item first. When a video or movie is selected, click the pencil like Edit icon on the left top tool bar to open the video editor window, here, you can play and preview the original video and output effects. Also you can flip or rotate video, trim, crop, add watermark, apply special effect, edit audio or insert external subtitle.

Step 4: Start the conversion process.
After all the settings is over, go back to the main interface and hit right-bottom "Convert" button to start to convert Sony FDR-AX700 4K video to iMovie best compatible 1080p Apple Intermediate Codec odec format.
When the conversion is completed, launch iMovie on your Mac computer to import converted video to iMovie for smooth editing workflow on either fast or slow Mac computer.
Related Articles
Any Product-related questions?support@pavtube.com