The EOS C200 Digital Cinema Camera can record internal 4K RAW to a CFast™ 2.0 card, 4K UHD and Full HD in MP4 format to SD cards as well as 2K Proxy video in MP4 format. For Mac user who own a Final Cut Pro X, you may come the idea to load the Proxy video into FCP X for some professional post editing workflow. The following article will show you how to get a smooth and high quality workflow of Canon C200 MP4 Proxy video with Final Cut Pro X.
Can Final Cut Pro native import Canon C200 MP4 Proxy video?
The Canon C200 shots MP4 Proxy format video encoded with MPEG-4 AVC/H.264 compression codec, which is the native import formats for FCP X. However, if you try to directly load the H.264 codec into FCP X, you won’t get a good editing performance. The main reason is that H.264 is a good delivery file format but not a good editing format. It has the following drawbacks when working directly with FCP X:
1. H.264 is mathematically intense. It takes some serious computer horsepower to decode its compression.
2. Because it is so mathematically challenging, it takes longer to render H.264 files than other formats.
3. As H.264 is an 8-bit format shot by HDSLR, which means you are potentially compromising your effects and especially color correction and composing gradients.
4. H.264 does not integrate easily with other video formats
Hot Search: Import Canon C200 MP4 Proxy to Premiere Pro
Encode Canon C200 MP4 Proxy to Prores for FCP X Best Editing Workflow
To avoid above listed issues when editing Canon C200 MP4 Proxy H.264 with FCP X, it would be much ideal for you to encode Canon C200 MP4 Proxy H.264 to Apple Prores, a high quality and high performance editing codec specially designed for FCP X. Moreover, the Prores codec support all of the current frame size such as SD, HD, 2K, 4K and 5K. Unlike the 8-bit H.264 codec, Prores is a 10-bit editing codec which can assist you to process a lot of more color data and make the color correction process easier on Premiere Pro.
Here, you can get the job easily completed with a simple to use yet powerful Mac Prores Converter called Pavtube Video Converter for Mac. The program can facilitate you to efficiently transcode Canon C200 MP4 Proxy video to FCP X most favorable Prores codec with various different file types including Apple Prores 422, Apple Prores 422 HQ, Apple Prores 422 Proxy and Apple Prores 422 LT.
Tips: Here, we highly recommend you to choose the Prores 422 format, which format is mainly designed for working with 2K footage. It will ensure you a high quality and high performance editing workflow. If you have tons of footage, need to edit using smaller hard drives, or are going to go through an off-line to on-line process, then choose Prores LT. While the Prores 422 Proxy format should only be used when file size is more important than image quality.
Notes:
1.When converting video to Final Cut Pro oriented format templates(e.g. Apple Prores), please ensure that your computer has Final Cut Pro installed, otherwise the converted files will have audio only without image.
2.If you are using FCP X, please make sure you have installed ProApps QuickTime Codecs, or you may get files with sound only without video.
Get Pavtube Video Converter for Mac with 20% off discount, coupon codec: 45K2D47GJH |
Step by Step to Transcode Canon C200 MP4 Proxy to Prores for FCP X Editing?
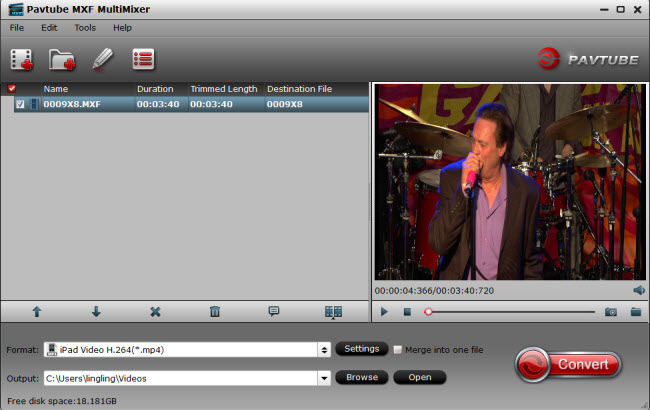
Step 1: Load Canon C200 MP4 Proxy video.
Download the free trial version of the program. Launch it on your computer. Click "File" menu and select "Add Video/Audio" or click the "Add Video" button on the top tool bar to import Canon C200 MP4 Proxy video from your computer local hard drive into the program.

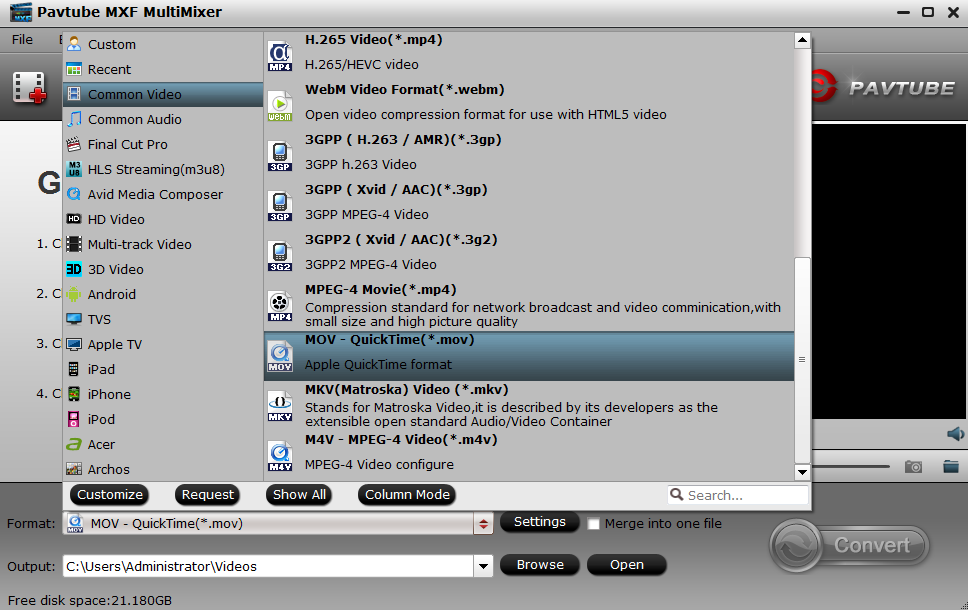
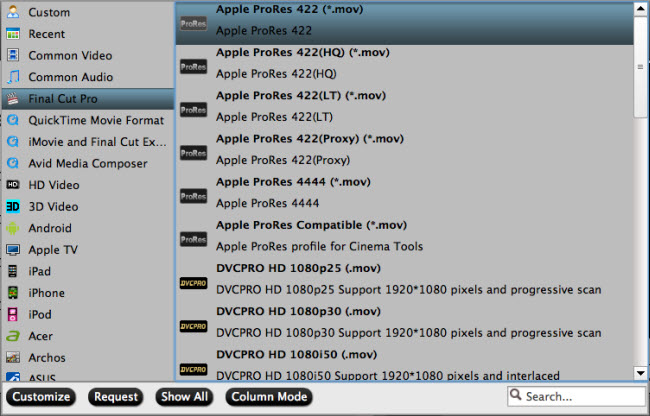
Step 2: Define the output format.
Clicking the Format bar, from its drop-down list, select Final Cut Pro X best favorable editing codec "Apple Prores 422 (*.mov)" under "Final Cut Pro" main category. If can also choose other Prores format according to your own needs based on the standards listed above.
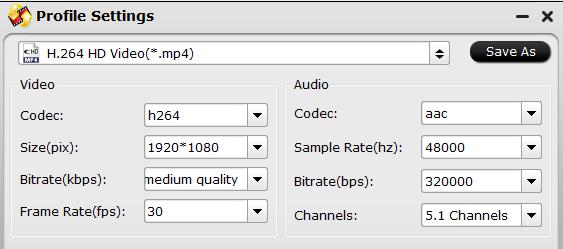
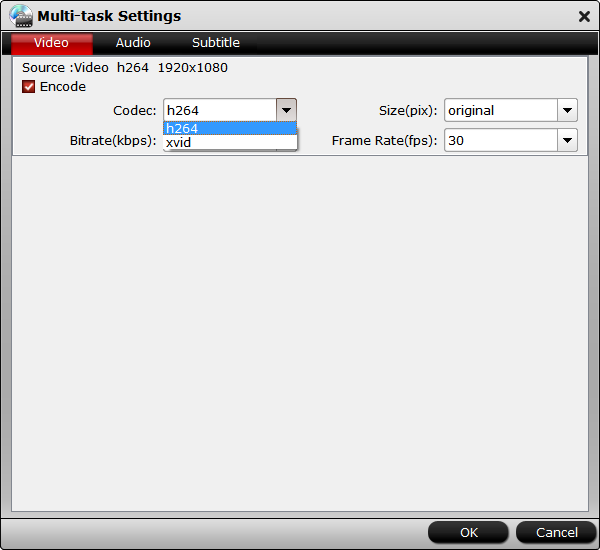
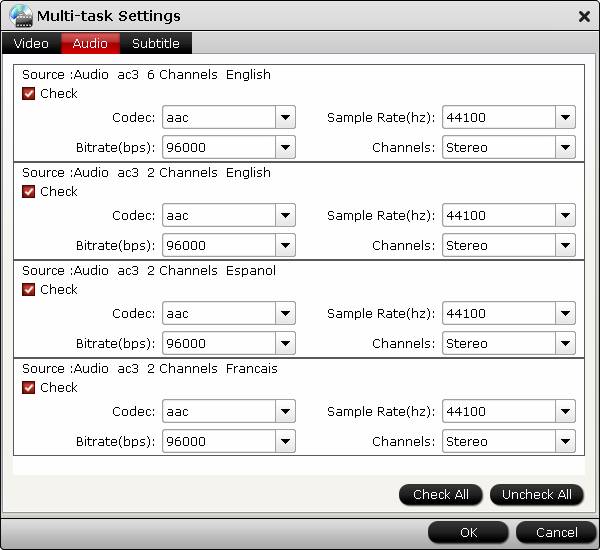
Step 3: Adjust output profile parameters.
Click "Settings" on the main interface to open "Profile Settings" window, here, you can flexibly choose or specify exactly the profile parameters including video codec, resolution, bit rate, frame rate, audio codec, bit rate, sample rate, channels, etc as you like to get better output video and audio quality.

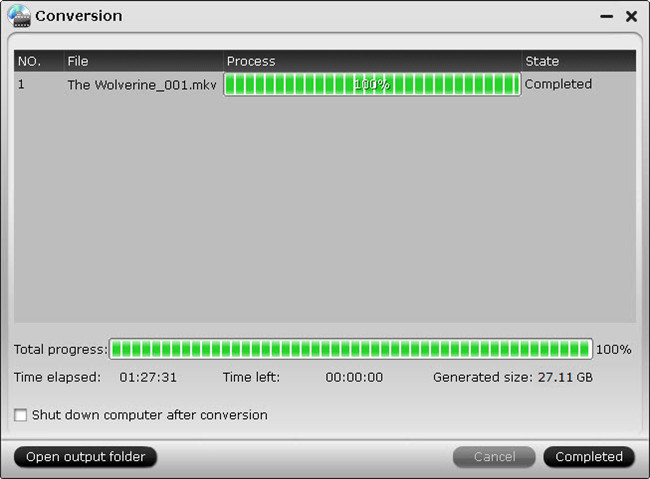
Step 4: Begin the conversion process.
After all setting is completed, hit the "Convert" button at the right bottom of the main interface to begin the conversion process from Canon C200 MP4 Proxy to Apple Prores encoding process.
When the conversion is finished, click "Open Output Folder" icon on the main interface to open the folder with generated files, feel free to import video to FCP X for professional post editing workflow.
The EOS C200 Digital Cinema Camera can record internal 4K RAW to a CFast™ 2.0 card, 4K UHD and Full HD in MP4 format to SD cards as well as 2K Proxy video in MP4 format. For Mac user who own a Final Cut Pro X, you may come the idea to load the Proxy video into FCP X for some professional post editing workflow. The following article will show you how to get a smooth and high quality workflow of Canon C200 MP4 Proxy video with Final Cut Pro X.
Can Final Cut Pro native import Canon C200 MP4 Proxy video?
The Canon C200 shots MP4 Proxy format video encoded with MPEG-4 AVC/H.264 compression codec, which is the native import formats for FCP X. However, if you try to directly load the H.264 codec into FCP X, you won’t get a good editing performance. The main reason is that H.264 is a good delivery file format but not a good editing format. It has the following drawbacks when working directly with FCP X:
1. H.264 is mathematically intense. It takes some serious computer horsepower to decode its compression.
2. Because it is so mathematically challenging, it takes longer to render H.264 files than other formats.
3. As H.264 is an 8-bit format shot by HDSLR, which means you are potentially compromising your effects and especially color correction and composing gradients.
4. H.264 does not integrate easily with other video formats
Hot Search: Import Canon C200 MP4 Proxy to Premiere Pro
Encode Canon C200 MP4 Proxy to Prores for FCP X Best Editing Workflow
To avoid above listed issues when editing Canon C200 MP4 Proxy H.264 with FCP X, it would be much ideal for you to encode Canon C200 MP4 Proxy H.264 to Apple Prores, a high quality and high performance editing codec specially designed for FCP X. Moreover, the Prores codec support all of the current frame size such as SD, HD, 2K, 4K and 5K. Unlike the 8-bit H.264 codec, Prores is a 10-bit editing codec which can assist you to process a lot of more color data and make the color correction process easier on Premiere Pro.
Here, you can get the job easily completed with a simple to use yet powerful Mac Prores Converter called Pavtube Video Converter for Mac. The program can facilitate you to efficiently transcode Canon C200 MP4 Proxy video to FCP X most favorable Prores codec with various different file types including Apple Prores 422, Apple Prores 422 HQ, Apple Prores 422 Proxy and Apple Prores 422 LT.
Tips: Here, we highly recommend you to choose the Prores 422 format, which format is mainly designed for working with 2K footage. It will ensure you a high quality and high performance editing workflow. If you have tons of footage, need to edit using smaller hard drives, or are going to go through an off-line to on-line process, then choose Prores LT. While the Prores 422 Proxy format should only be used when file size is more important than image quality.
Notes:
1.When converting video to Final Cut Pro oriented format templates(e.g. Apple Prores), please ensure that your computer has Final Cut Pro installed, otherwise the converted files will have audio only without image.
2.If you are using FCP X, please make sure you have installed ProApps QuickTime Codecs, or you may get files with sound only without video.
Get Pavtube Video Converter for Mac with 20% off discount, coupon codec: 45K2D47GJH |
Step by Step to Transcode Canon C200 MP4 Proxy to Prores for FCP X Editing?
Step 1: Load Canon C200 MP4 Proxy video.
Download the free trial version of the program. Launch it on your computer. Click "File" menu and select "Add Video/Audio" or click the "Add Video" button on the top tool bar to import Canon C200 MP4 Proxy video from your computer local hard drive into the program.
Step 2: Define the output format.
Clicking the Format bar, from its drop-down list, select Final Cut Pro X best favorable editing codec "Apple Prores 422 (*.mov)" under "Final Cut Pro" main category. If can also choose other Prores format according to your own needs based on the standards listed above.
Step 3: Adjust output profile parameters.
Click "Settings" on the main interface to open "Profile Settings" window, here, you can flexibly choose or specify exactly the profile parameters including video codec, resolution, bit rate, frame rate, audio codec, bit rate, sample rate, channels, etc as you like to get better output video and audio quality.
Step 4: Begin the conversion process.
After all setting is completed, hit the "Convert" button at the right bottom of the main interface to begin the conversion process from Canon C200 MP4 Proxy to Apple Prores encoding process.
When the conversion is finished, click "Open Output Folder" icon on the main interface to open the folder with generated files, feel free to import video to FCP X for professional post editing workflow.