Wednesday, January 31, 2018

Edit 4K Prores with Sony Vegas Pro 14/13/12

As one of the Windows exclusive professional non-linear editing software, Sony Vegas Pro gains great popularity for its fast speed, ease of use, comprehensive and rich editing features and also wide format import capability. However, a lot of people complain that fail to load the 4K Prores to Sony Vegas Pro 14 or early versions.

Media compatibility of 4K Prores with Sony Vegas Pro

From the specification page of Sony Vegas Pro 15, we can find the information that it has included native importing support for Prores format. In addition, as Vegas Pro 9 has included editing support for 4K resolution video, therefore, you will have no problem to load 4K Prores to Vegas Pro 15. However, we find no Prores importing support on Vegas Pro 14 specification page, not to mention the earlier version such as Vegas Pro 13/12, etc. There, to edit 4K Prores with Vegas Pro or earlier version, you will need to perform a codec transcoding process.

Transcode 4K Prores for Vegas Pro 14/13/12 editing

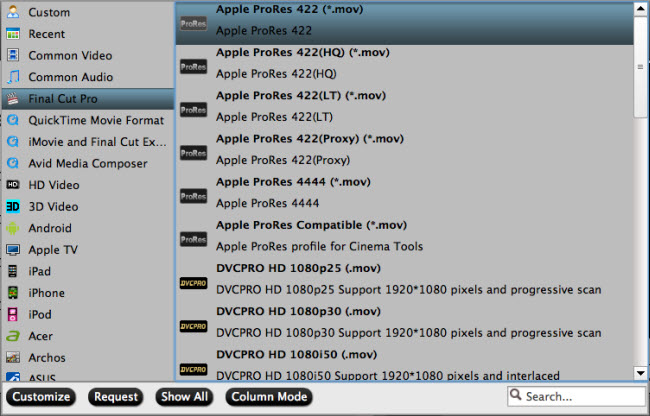
Here, you can get the job easily done by downloading our most powerful 4K Prores Converter - Pavtube Video Converter. The program has perfect importing support for 4K Prores in various different file types including Apple Prores 4444 XQ, Apple Prores 4444, Apple Prores 422, Apple Prores 422 LT, Apple Prores 422 LT. The program not only assists you to transcode 4K Prores to Vegas Pro 14/13/12 editable MP4, MOV, WMV, MPEG-1/2/4, etc but also facilitates you to directly export Vegas Pro 14/13/12 specially optimized MPEG-2 codec with the optimal editing settings.

Related article: Top 10 Prores Converter | Blu-ray to Prores 422 | 1080p MKV to Prores 422 HQ 

Pavtube Video Converter is pretty simple to use, no matter experienced user or fresh could handle it very well. In addition, it has perfect compatibility with all Windows OS including Windows 10, 8.1, 8 and 7. The final results produced by the program are pretty high quality, you can't tell the difference between the converted video and the original 4K Prores video.

How to Convert 4K Prores for Vegas Pro 12/13/14 Editing?

Step 1: Load 4K Prores files.

Download the free trial version of the program. Launch it on your computer. Click "File" menu and select "Add Video/Audio" or click the "Add Video" button on the top tool bar to import 4K Prores files into the program. The program supports batch conversion mode, you can batch load multiple files at one time.

Load 4K Prores files

Step 2: Define the output format.

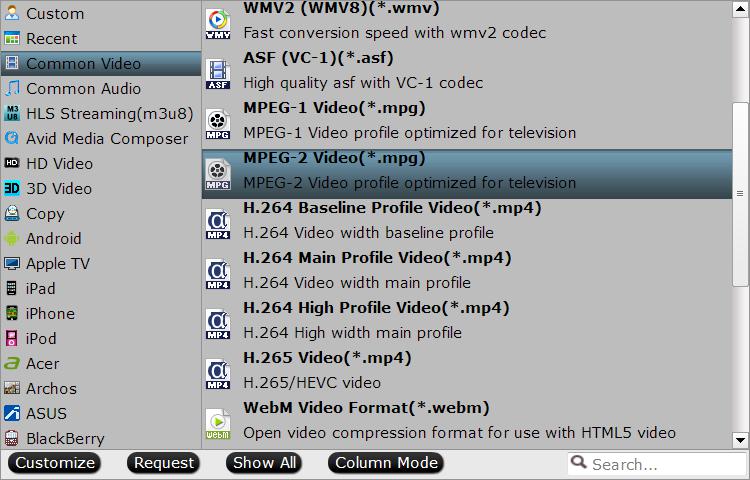
Clicking the Format bar, from its drop-down list, select one of Vegas Pro 14/13/12 supported editing formats such as "MPEG-2 Video(*.mpg)" under "Common Video" main category.

Output Prores supported editing format

Tips: Click "Settings" on the main interface to open "Profile Settings" window, here, you can flexibly choose or specify exactly the parameters including video codec, resolution, bit rate, frame rate, audio codec, bit rate, sample rate, channels, etc as you like to get better output video and audio quality for Vegas Pro users.

Alternatively, you can also choose to directly output Vegas Pro 14/13/12 specially optimized editing codec by following "Adobe Premiere/Son..." > "MPEG-2 (*.mpg)".

Output Vegas Pro specially optimized editing format

Step 3: Begin the conversion process.

After all setting is completed, hit the "Convert" button at the right bottom of the main interface to begin the conversion process from 4K Prores to Vegas Pro 12/13/14 supported editing formats or preset profile editing formats.

When the conversion is finished, click "Open Output Folder" icon on the main interface to open the folder with generated files. Then feel free to load and import and edit converted Prores files with Vegas Pro 12/13/14 for high quality and high performance editing workflow.

Tuesday, January 23, 2018

Import DJI Osmo+ 4K to Davinci Resolve

The DJI Osmo+ is a handheld Gimbal with an integrated Zoom Camera, it offers up to 7x zoom when shooting in Full 1080p resolution, and up to 3.5x zoom at all other resolutions. As an advanced 4K camera, it shoots up to crisp DCI 4K (4096 x 2160) resolution at 24/25 fps, UHD 4K at up to 30 fps in either MP4 or MOV container format with MPEG-4 AVC/H.264 compression codec. When the shooting is done, for people who want to do some color correction and professional audio post production of the DJI Osmo+ 4K video, Davinci Resolve can be the best choice for you. The following article will show you how to smoothly import DJI Osmo+ 4K to Davinci Resolve for a high quality editing workflow.

Can Davinci Resolve support 4K resolution video editing?

Davinci Resolve's official website shows that the Davinci Resolve 12.5 and later version only supports to import UHD video with a resolution of 3840 x 2160, it also means that if you try to load DJI Osmo+ DCI 4K video with 4096 x 2160 to Davinci Resolve, you will definitely suffer video playback choppy or stuttering issues.

Native work Osmo+ H.264 MP4/MOV with Davinci Resolve

Although the H.264 MP4/MOV video shot with DJI Osmo+ is included in Davinci Resolve supported file formats list. However, it is well known that H.264 is just a good delivery file format, it is not a good editing format. If you try to edit H.264 native with Davinci Resolve, you start to lose image quality as you do color correction or composite gradients to create greenscreen keys.

To solve above listed image quality issues, it would be much ideal for you to transcoding DJI Osmo+ H.264 to a Davinci Resolve compatible higher bit-rate format such as Prores files, which render faster but have more room, you can create great looking effects without losing any quality.

Related article: Can FCP Support Osmo 4K Video | Osmo 4K with PPC 2015 | Edit Osmo 4K with Vegas Pro

Best tool to transcode DJI Osmo+ 4K H.264 to Prores for Davinci Resolve

Here, you can get the job easily completed by downloading our best Prores Converter - Pavtube Video Converter for Mac. The application can assist you to batch convert DJI Osmo+ 4K H.264 to Davinci Resolve most favorable high bit-rate editing format Apple Prores in various different file types including Apple Prores 422, Apple Prores 422 HQ, Apple Prores 422 Proxy and Apple Prores 422 LT. You can choose the suitable one according the following standards:

If you computer is old or slow, or you just want to do some rough editing, you can select to output "Apple Prores Proxy)(*.mov)"or "Apple Prores (LT)(*.mov)"format to save more space and bandwidth. However, if your computer are powerful enough to handle multicam and high-resolution video and you are going to do many effects editing work with Davinci Resolve, you'd better choose to output "Apple Prores 422(*.mov)"or "Apple Prores 422(HQ)(*.mov)"for better performance.

For Windows users, you can go to download Pavtube Video Converter to complete the conversion on Windows 10/8.1/8/7.

How to Import and Edit DJI Osmo+ 4K Video with Davinci Resolve?

Step 1: Load DJI Osmo+ 4K video.

Download the free trial version of the program. Launch it on your computer. Click "File" menu and select "Add Video/Audio" or click the "Add Video" button on the top tool bar to import source DJI Osmo+ 4K video files into the program.

Load DJI Osmo+ 4K video

Step 2: Select output file format.

Click "Format"bar, from its drop-down list, select your desired Prores format such as "Final Cut Pro" > "Apple Prores 422(*.mov)", you can also choose other prores formats on your own needs.

Define output file format

Step 3: Edit DJI Osmo+ 4K video.(optional)

Select an item on the main interface to active the "Editor" menu, then click the pencil like icon to open "Video Editor" Window, you can play and preview the original video and output effects. Also you can flip video, trim, add special effect, reset, and adjust volume.

Edit DJI Osmo+ 4K video

Step 4: Convert DJI Osmo 4K video to Apple Prores format.

Go back to the main interface and press the "Convert" icon on the right-bottom to start DJI Osmo+ 4K video to Davinci Resolve Apple Prores conversion process.

When the conversion is done, feel free to import converted video to Davinci Resolve for furthering professional editing.

Wednesday, January 17, 2018

Best Video Editor for DJI Mavic Pro

XDCAM EX is a variation of XDCAM HD that records full HD resolution as either 1920 x 1080 or 1280 x 720 footage. XDCAM EX video and audio content is stored on disc within MP4 container files. The footage is recorded on SxS cards, based on the PCMCIA ExpressCard/34 form factor. Some people try to import and edit XDCAM EX footage with Davinci Resolve, but they often fail to do that due to the format incompatible issue.

Can Davinci Resolve native import XDCAM EX files?

From Davinci Resolve supported file formats list, we can see that it offers no native importing support for the XDCAM EX files. Therefore, to successfully load the XDCAM EX MP4 files into Davinci Resolve, the best solution is transcoding XDCAM EX to Davinci Resolve editable codec such as QuickTime, Prores, DNxHD, etc.

Related article: Edit VOB with Davinci Resolve | Import AVCHD to Davinci Resolve | Convert Davinci Resolve to AVI

Transcode XDCAM EX MP4 to Prores or DNxHD for Davinci Resolve

Here, you can easily produce Davinci Resolve compatible QuickTime, DNxHD or Prores codec by download this powerful yet simple to use application called Pavtube Video Converter for Mac (Best Mac Video Converter Review). The program has perfect importing support for the XDCAM EX MP4 files shot with Sony camera. Thanks to its batch conversion mode, you can load multiple XDCAM EX MP4 files into the application for conversion at one time.

The application can assist you to direct convert XDCAM EX to Davinci Resolve native compatible Prores, QuickTime or DNxHD codec with perfect quality and super-fast encoding speed. To get better output video and audio file quality, feel feel to adjust the output profile parameters such as video codec, resolution, bit rate, frame rate, audio codec, bit rate, sample rate, channels, etc as you like.

For Windows users, you can go to download and install the Windows version - Pavtube Video Converter to perform the conversion on Windows 10/8.1/8/7.

Step by Step to Transcode XDCAM EX MP4 for Davinci Resolve Editing

Step 1: Load XDCAM EX files into the program.

Start the program on your computer, on the main interface, click "File" > "Add Video/Audio" or "Add from folder" to load Sony XDCAM EX MP4 files into the program.

Load XDCAM EX MP4 files

Step 2: Specify output file formats.

Click "Format" bar, from its drop-down list, select Davinci Resolve best supported editing codec such as "Avid DNxHD (*.mov)" from "Avid Media Composer" or "Apple Prores 422(*.mov)" from "Final Cut Pro" main category menu extended list.

Output Davinci Resolve supported editing codec

Step 3: Start the conversion process.

After all the setting is done, click right-bottom "Convert" button to start encoding XDCAM EX MP4 files to Davinci Resolve preferred editing codec.

When the conversion is completed, click "open Output Folder" button on the main interface to pop out the folder with converted files, then you will have no problem to import and edit XDCAM EX files with Davinci Resolve on either Windows or Mac.

Wednesday, January 10, 2018

Play M2TS on DVD Player

The M2TS files are generally used with Sony formats and hardware, particularly Blu-ray Disc and AVCHD. The M2TS files can be played with many desktop software players such as VLC, SMPlayer, 5KPlayer or hardware Blu-ray players or game consoles Sony PlayStation 3/4/Pro. For those standard DVD owners, you may be disappointed to find that you can't get M2TS files played on DVD Player or DVD Player connected TV. The following article will share you 2 workable ways to fix this issue.

Solution 1: Convert M2TS to DVD Player supported digital file formats
Solution 2: Burn M2TS to DVD disc for DVD Player viewing

Solution 1: Convert M2TS to DVD Player supported digital formats

Today, most high-end DVD Player models features USB inputs that can be used to house USB flash drives filled with movies. You can then access the files through your DVD player's main menu and watch them on your TV screen. First, look in the instruction manual for your DVD player to see what types of video files it supports. DVD players won't just support any file format--most support .MKV or .AVI files, among a few other popular formats. Be sure to look in the "Technical Specifications" listing in your DVD player's instruction manual to see what formats it will support before potentially wasting your time.

Obviously, M2TS is not the supported file format by DVD Player. The good news is that you can use a third-party M2TS Converter such as Pavtube Video Converter (get Mac version) to easily transcode M2TS to DVD Player most compatible MPEG-2 file format.

Simple steps to convert M2TS to DVD Player MPEG-2 format

Step 1: Load M2TS files into the application.
Step 2: Output DVD Player most compatible MPEG-2 format.

Output DVD Player best supported MPEG-2 format

Step 3: Begin the conversion by hitting right-bottom convert button.

After the conversion, you can then following the steps below to play converted M2TS files on DVD Player.

Step 1: Put your USB flash drive into a USB port on your computer.
Step 2: Open your USB flash drive by clicking on "My Computer" and then clicking on the icon for your flash drive.
Step 3: Drag the appropriately formatted video files into this window. They will now be transferred to your USB flash drive.
Step 4: Remove the USB flash drive from your computer.
Step 5: Put your USB flash drive into an open USB port on your DVD player.
Step 6: Use your DVD player's remote control to navigate to the "USB Flash Drive" menu. Select the file you want to play from the list by highlighting it and pressing the "Enter" or "Play" buttons on the remote. The file will now play on your TV screen.

Solution 2: Burn M2TS to DVD disc for DVD Player viewing

Although there are many DVD disc burning software on the market, however, if you are looking for a simple to use application that can assist you to directly burn DVD disc from M2TS files, we highly recommend Pavtube DVD Creator (get Mac version) to you. The program not only assists you to burn M2TS files to DVD disc but also offers beneficial DVD menu editing features for you to change DVD menu template/style, menu text, display aspect ratio and background, you can also set chapter marker and playback mode.

Apart from M2TS files, you can also use this powerful DVD authoring tool to create DVD disc from other types of digital file formats such as AVI, WMV, MP4, MOV, MKV, Tivo, etc.

Step by Step to Burn M2TS Files to DVD Disc

Step 1: Insert a blank DVD disc into your computer optical drive.

Insert a blank DVD-R (DVD+R, DVD+RW, DVD-RW) into the DVD-ROM drive of your computer.

Step 2: Add M2TS video into the program.

Run the DVD Creator software, import M2TS files into it for burning DVD disc project.

Add M2TS video

Step 3: Customize DVD menu.

Switch to the menu pane, double click a DVD menu beneath the Menu Template to apply it to your DVD. You can customize the background video/image, background music, text, title thumbnail and more for your DVD menu. You can also choose the DVD quality at the bottom of the software, higher quality requires bigger DVD disc volume.

Customize DVD menu

Step 4: Start M2TS video to DVD disc burning process.

Click the "Burn" button to start burning Halloween videos to DVD. You can burn M2TS video to DVD disc, save as ISO file or Generate to DVD Folder.

Burn M2TS files to DVD disc

Tuesday, January 2, 2018

Edit Mavic Pro Platinum 4K Video with Davinci Resolve

DJI's new drone - Mavic Pro Platinum, which is released back in August of this year, comes with a set of redesigned rotor blades that the company claims make the unit 60 percent quieter than the previous model - DJI Mavic Pro. What different change is the video recording capability, the new DJI Mavic Pro Platinum also enables you to shot both DCI (4096x2160) and UHD 4K (3840x2160) wrapper in either MOV or MP4 container with MPEG-4 AVC/H.264 compression codec. After the shooting stage, if you are looking for a great tool for editing, color correction and professional audio post production all in a single application, Davinci Resolve can be best choice. What really matters is how to get the best workflow of Mavic Pro Platinum Pro 4K with Davinci Resolve.

Work Mavic Pro Platimum 4K H.264 native with Davinci Resolve

From Davinci Resolve supported file formats, we can see that this professional non-linear editing software has perfect compatibility with various file types and formats. H.264 is also included. However, although H.264 is a good delivery file format, it is not a good editing format. The main reason is that H.264 is an 8-bit video format. If you edit it natively, you start to lose image quality as you do color correction or composite gradients to create greenscreen keys. There just isn't a lot of room to work. Transcoding to a higher bit-rate format solves these image quality issues.

Related article: Play DJI Phantom 4K on VLC | Compress Mavic Pro 4K to 1080p | Upload DJI Phantom Video to YouTube

Best editing workflow of Mavic Pro 4K with Davinci Resolve

Prores files are larger, but they render faster and have more room, so you can create great looking effects without losing any quality when working with Davinci Resolve. Here, you can easily transcode Mavic Pro 4K Platinum 4K to Apple Prores codec with best our best Prores Converter - Pavtube Video Converter for Mac. The program has perfect importing support for the DJI Mavic Pro 4K H.264 MP4/MOV video. Thanks to its batch conversion mode, you can load multiple video into the application for conversion at one time.

The program can assist you to convert Mavic Pro 4K video into Davinci Resolve most favorable color correction editing codec - Apple Prores in different types. If your Mac computer are powerful enough and you wish to apply more effects editing, just choose the "Apple Prores 422" or "Apple Prores 422 HQ" format. If your computer lacks the ability to handle 4K resolution video, you just want to do some rough editing or offline editing, "Apple Prores 422 Proxy" or "Apple Prores LT" can better satisfy your great demand.

For Windows users, you can also download and install Pavtube Video Converter to export Apple Prores codec from Mavic Pro Platinum 4K on Windows 10/8.1/8/7.

Step by Step to Transcode and Edit DJI Mavic Pro Platinum 4K with Davinci Resolve

Step 1: Input DJI Mavic Pro Platinum 4K video.

Download the free trial version of the program. Launch it on your computer. Click "File" menu and select "Add Video/Audio" or click the "Add Video" button on the top tool bar to import source DJI Mavic Pro Platinum 4K video into the program.

Load DJI Mavic Pro Platinum 4K video

Step 2: Define the output format.

Clicking the Format bar, from its drop-down list, select Davinci Resolve most favorable color editing codec "Apple Prores 422(*.mov)" as the output file format.

Output Davinci Resolve favorable Prores format

Tips: If your computer is slow to handle 4K resolution video, just output a smaller file resolution "Apple Prores 422 (Proxy) (*.mov)" for smooth editing workflow.

Output Prores 422 Proxy format

Step 3: Edit DJI Mavic Pro Platinum 4K video.

On the top tool bar on the main interface, click the pencil like icon to open "Video Editor" window, you can trim Blu-ray movies to remove the unwanted parts by setting the start and end time, crop to remove the black borders or unwanted area by dragging the dash line around the video frame, flip video, add text/image/video watermark, change video picture effect, replace/remove audio in video, add external subtitles, etc.

Edit Mavic Pro Platinum 4K video

Step 4: Begin the conversion process.

After all setting is completed, hit the "Convert" button at the right bottom of the main interface to begin the conversion process from Mavic Pro Platinum 4K to Davinci Resolve most preferable Apple Prores editing format.

When the conversion is finished, click "Open Output Folder" icon on the main interface to open the folder with generated files. Then feel free to load the compatible Mavic Pro Platinum 4K video into Davinci Resolve professional post editing workflow.