Showing posts with label best dvd ripper. Show all posts

Thursday, June 12, 2014

How to collect classic DVD movies with DVD Copying tool

DVD discs are fragile and susceptible to scratches, nicks, and getting lost. So you want an easy way to make a backup copy right? This article will be your right answer.

If you are a movie lover, you may be not hesitated to buy the hottest Hollywood films or interesting Disney films in DVD discs for collection after wathing in the cinema. However, day after day and year after year, when DVDs filled the entire cabinet or even half of the room, it is necessary to know that How to collect these classic DVD movies.
With the progress of era, some of the DVD player is no longer in production, some formats already slowly be we rejected. When a year later, after two years or ten years later our DVD player is broken or we need to watch DVDS on other devices, then what shall I do? Here I would like to say, whatever happened to make a backup all of your DVD is the best choice in case your discs get damaged or destroyed, then you can freely enjoy your favourite DVDs without loading DVD disc, isn’t it fantastic?

What you need is a powerful tool for ripping DVD movies. Pavtube DVDAid is a professional program in making digital copy of DVD. It can also rip the latest DVD (Disc/Floder/ISO/IFO) and convert to various video formats for some popular smartphones and tablets as well as editing software. Simple interface and CUDA acceleration will bring you an easy but effective conversion. The following guide will show you detailed steps.

You can have the trial version to try all the functions firstly, and then download the retail version to install it. (Mac users go to get DVDAid for Mac).

How to convert/copy classic DVD movies for a safe storage:

Step 1. Install Pavtube DVDAid on your Windows/Mac.

Step 2. Launch Pavtube DVDAid , and load your DVD movie from your DVD-ROM to the app.


Step 3. Click the “Browse” button to set output folder where you want to save the copied DVD movies.

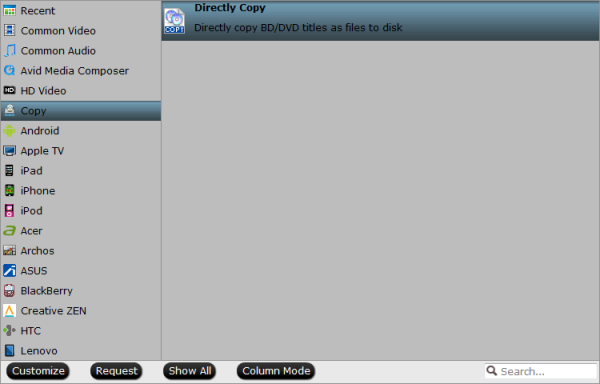
Step 4. Hit the Copy the entire disc icon on the main interface and start DVD backing up process. It enables you to makes 1:1 copy of original DVD Disc without quality loss with all audio streams, subtitle tracks, extras, etc.

Note: You can find the “Directly Copy” option to backup DVD main movie without extras. It will support to backup 100% intact the DVD main movie with all multiple tracks preserved. And you will get one M2TS file for output.


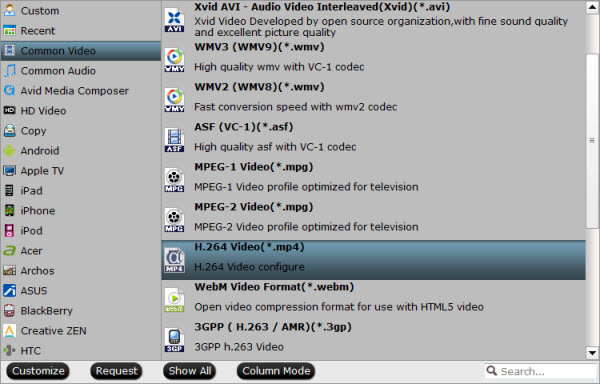
Alternatively, you are suggested to choose “Common Video -> H.264 MP4 Video (*.mp4)” for putting DVD to an external drive for playback.


Click big Convert button on the interface and then you will get a conversion dialogue box to show the exact progress, like time left, estimated size, state and so on.

Now coping classic DVD to an external hard drive, hard disk drive (HDD) or thumb drive is extremely easy. Have a try now! Only a few simple steps can reduce your worries.

More topics:

Free Download Windows 8.1 DVD Ripper
DVD Ripper Mac - Rip DVD to Any Video/Audio on Mac
Copy 2014 Disney Blu-ray movies to Android Tablet/Phone for watching

Tuesday, April 1, 2014

How to backup your DVD disc collections to home server for playback

Description: A simplest DVD to MP4 ripping tutorial; you can easily backup DVD collections and convert them to best MP4 file for sharing to home media server with this Pavtube DVD Ripper.

"I own a large DVD collection. The movies are watched almost every day by a member of the family. Will it be possible to digitize these DVD discs and play on a laptop hooked to a TV or out side in the home theater? Really worry about disc scratch and damage…"

Many people prefer to build a home media server to store all your photos, movies and more in a central location. Usually it integrates with all your family's home computer; everyone in your family can access shared folders of photo albums, music and movies from any device in your home network.


How to backup your DVD disc collections to home server for playback? Well, first of all you need to roll off the disc protection, and then convert them to more common video formats like MP4 which is compatible with most devices, like computer, smartphone, tablet, TV, console, etc.

Hereby you need a DVD ripping software.

Among many tools in various brands, Pavtube DVD Ripper is definitely hands down better in ease of use, ripping speed and quality of video output. It simply break your disc protection in background which you don't need to operate manually; just set the target format and you get the best videos.


Tips: Got the Mac version for you – Pavtube DVD Ripper for Mac

Download a free trial of this user-friendly Pavtube DVD Ripper and let's start this super-easy workflow.

Tutorial: How to backup DVD to home media server

Step 1. Insert your DVD and launch Pavtube DVD Ripper.

Insert your disc to computer, launch Pavtube DVD Ripper and click the disc-like icon on the top, click disc name to load your movie.


Notice the "Subtitles" and "Audio" options above format list? You can choose one subtitle or language and build them into target video. Anyway, if you want to obtain multiple audio tracks or subtitles, try this Pavtube ByteCopy.

Step 2. Choose "H.264 MP4" format.

Click "Format" drop-down list, choose "HD Video>H.264 HD Video(*.mp4)" as below:


H.264 MP4 is well compatible with main stream devices like PC/Mac, IOS/Android/Windows smartphone&tablet, etc.

(Optional): adjust target file specs.

If you are not satisfied with the default file specs, hit the "Settings" icon (besides "Format") and free change video size, bitrate, frame rate, and audio sample rate, etc.

Step 3. Conversion.

Hit the big red "Convert" in right bottom corner to start ripping DVD to MP4 format directly. Wait for a while when it's ripping; after it completed, hit "Open" or "Open output folder" to quick locate generate MP4 files.

Now just stream them to your home media server and share with family members!

Related articles: