To get the high quality editing effects, we sometimes need to convert the audio clips into Premiere Pro for a further dispose, right? So in this article, if you find that we have issues when importing the WAV audio files to Premiere Pro on Yosemite, just read this guide and you will know more details on how to easily let Premiere Pro read the WAV files without troubles.

According to Adobe official site or the Premiere Pro supported video/audio formats, Adobe Premiere Pro can import lots of compressed and uncompressed audio formats including MP3, WAV, AAC, AC3 (including 5.1 surround), AIFF, ASND (Adobe Sound Document), BWF (Broadcast WAVE format), M4A (MPEG-4 Audio) and WMA (Windows only). Adobe Premiere Pro will not import audio in other audio formats such as FLAC, CAF, OGG, Apple Lossless ALAC, APE, VOX, 3G2, AUD, MP2, etc.
Why we are always failed when importing WAV audio files to Premiere Pro on Yosemite? Adobe Premiere is sensitive to audio formats and audio sample rate. If supported compressed audio files are improted, such as audio in MP3, WMA, AAC, M4A, AC3, are imported, Adobe Premiere will conform the audio to editting audio in coresponding sample rate to the sequence that will be used in. That’s way many people successfully use MP3 or WMA files, however some people experience problems.
Hot Search: WAV to QuickTime | FCP to Premiere Pro | Videos to Premiere Pro
How to convert the WAV audio files, etc to Premiere Pro natively supported audios and sample rates?
For converting the WAV or other incompatible audio files to Premiere Pro supported ones, we here strongly would like to introduce you the Pavtube Video Converter for Mac, which matches with your sequences for fast import without confirming process. Not only for audio conversion, this program can also support the video conversion with a higher speed and easy operation work.
Steps on converting WAV to supported audio formats for Premiere Pro on Yosemite:
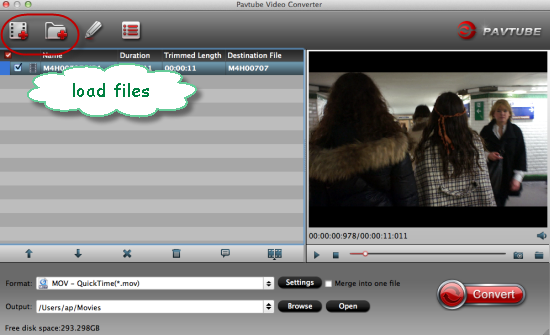
Step 1.Press on “Add File” button to load your source audio file to the program. You can simply drag & drop your audio files to load to the audio converter.
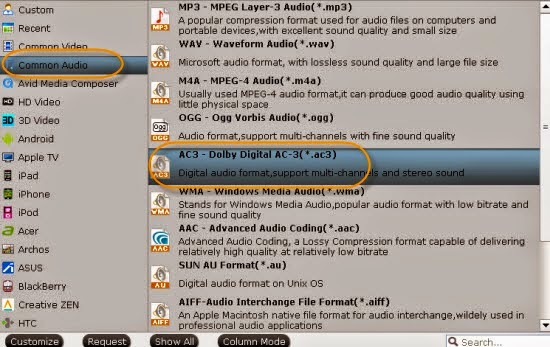
Step 2. Come to the output list to choose the right audio items for Premiere Pro as we mentioned above, just click the ‘Common audio’ to select the ‘MP3-MPEG Layer-3 Audio (*.mp3). Some other suitable ones you can also choose as a try.
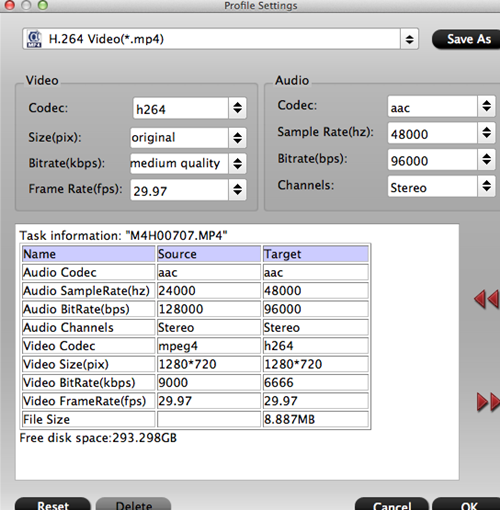
Step 3. Then don not forget to custom our audio encoder, in ‘Settings’ button, could you see the audio settings there? Here, we can adjust the output file audios as we like. Do you wanna a try?
In the end, just g to the main interface and hit the ‘Convert’ to start converting WAV files to suitable ones for Premiere Pro. When conversion is finished, on the Adobe Premiere, select File > Import from the main menu. Locate and select the converted audio file, then click Open. The file will be immediately added to the Premiere Project window.
More guides: