Can’t import Canon XF100 MXF files to Sony Movie Studio Platinum smoothly? In the following page, just convert MXF to MPG with a professional MXF assistant you can work the job well.
Having Received a question form website like this:’ We’re a public access cable channel organization and editing videos for broadcast on our channels. Recently, our photographer has recorded the a heavy traffic accident with Canon XF100 Camera with MXF format but we can’t edit them in Sony Movie Studio Platinum due to the incompatible format. I had been using open source Handbrake, but it did some bad conversions. Form MXF to MPG for Sony Movie Studio, so I need some MXF transcoding tips!
Reasons for why can’t Canon MXF files be edited in Sony Movie Studio Platinum.
For editing in Sony Movie Studio Platinum, we have to know better about this program, do you agree? Searched online, we know that it is a consumer-based non-line editing software designed for the PC. It is a scaled-down version of Sony Vegas Pro and supports best video format as MPEG-2, MOV and WMV. So MTS, as the non-native format for Sony Movie Studio Platinum, we surely can’t make it possible in editing Canon MXF files. As the special HD video formats, MXF is not so compatible with other NLEs, such as Premiere Pro, FCP, etc.
Any good ways to solve the problem above?
With the Canon MXF Video Converter for Windows, you can be able to solve this problem in an easy and fast way. Also some necessary conversion information are offered below:
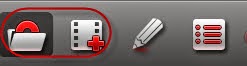
Firstly, Install and launch the Canon MXF Video Converter for Windows, and then click “Add Video” or ‘Add from folder’ button to import .MXF files.
Firstly, Install and launch the Canon MXF Video Converter for Windows, and then click “Add Video” or ‘Add from folder’ button to import .MXF files.
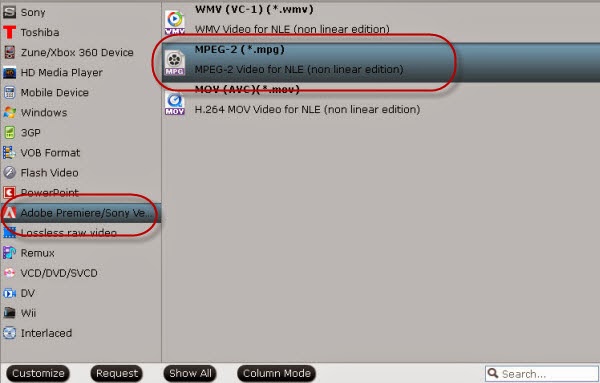
Secondly, Click “Format” bar and then move your pointer to “Adobe Premiere/Sony Vegas” and select “MPEG-2(*.mpg)” as the output format. Besides, you can also choose WMV (VC-1) (*.wmv) if you want to get a relatively smaller output file. Look at the picture below:
Then click the ‘Convert’ item to finish if you have the steps all done. Not? For those advanced users, more tips you can allow here:
1. Advanced Settings- If you would like to customize the video and audio parameters, you can click “settings”, adjust the parameters as you want, like Video Codec, aspect ratio, bit rate, frame rate, Audio codec, sampling rate, bit rate, channels.
2. Deinterlacing- Before start the conversion, click “Edit” button and you can deinterlace Canon MXF files for Movie Studio Platinum via checking off the “Deinterlacing” box in the Video Editor.
Editor's Recommendations
- Can Final Cut Pro X Edit DJI Phantom 4K video?
- Import and Edit Sony A6300 4K XAVC S to Avid Media Composer
- Tapeless MTS Workflow with Final Cut Pro 7
- Premiere Pro CC 2015 can’t import MPEG2 files
- Importing Typhoon-H 4K videos to FCP X for editing
- Tips for Importing and Editing Canon 5D Mark IV 4K MOV with Avid MC
- Top 5 best MXF video converter for Mac
- Import Canon XC15 4K footages to Premiere Pro CC
- Import 4K video (MOV, MP4, MXF, XAVC, MTS) to Pinnacle Studio for editing
- GoPro Hero 5 4K to FCP X - Importing GoPro Hero 5 4K footages to FCP X
- How to edit H.265/HEVC files in Adobe Premiere Pro?
- Compress and Convert Samsung NX500 4K H.265 video to 1080p video