‘The latest Canon XC10 XF-AVC 4K camcorder seems not bad to take the higher images but I got some troubles when importing the XC10 MXF recordings to VLC for playback. ‘Errors’ always appeared there on the screen. The files were broken or incompatible problems? I need some help.’
Why Windows Media Player or VLC Won’t Play MXF Files?
If you familiar with HD Video format, you may know the main reason is the MXF video codec. Most MXF files are encoded with a non-Microsoft codec or with a codec not installed on your Windows computer, you will fail to play this kind of MXF video. Such this situation often happens in other media players like VLC and Playback Pro. What efficient measures should we take to solve these problems?
Hot Search: MXF to FCP X | Convert MXF Audios | MXF to Premiere Pro | MXF to iMovie | MXF to YouTube
Analysis and methods to play MXF recordings so nicely.
For those users who wanna play MXF video on different media players such like QT, WMP or Playback Pro, etc, today here we are going to seek a professional MXF converter to make the original MXF recordings to compatible codecs for these players. We need some MXF tips to make this workflow works well right? Pavtube Video Converter for Windows fortunately can be the best MXF transcoding program to help us a lot.
How to rewrap XC10 MXF to suitable MP4, MOV for playback VLC, WMP and Playback Pro?
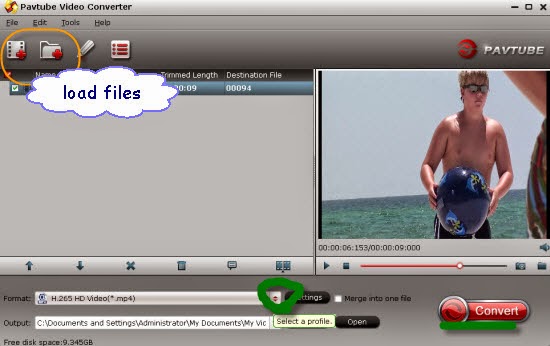
Step 1: Download, install and run this XC10 MXF Video Converter as a professional MXF to VLC/WMP Converter. When its main interface pops up, click ‘Add File’ button to import mxf video files to it. Directly drag the files in is also not a bad idea.
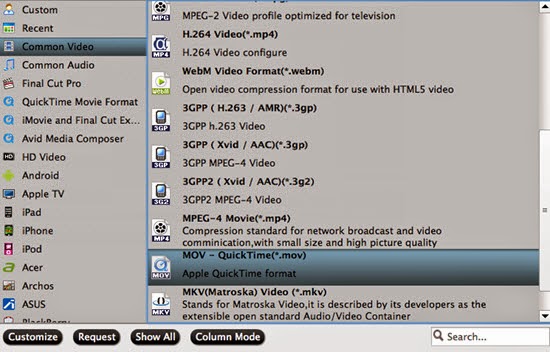
Step 2. Click Format bar and choose best output format for output. Click and choose common video -> MOV-QuickTime (*.mov). You can also choose other formats for output as you want. While for VLC media player and Playback Pro, though there is no ‘VLC’ item, we can choose the ‘H.264 HD Video (*.mp4)’ in the ‘HD Video’ column.
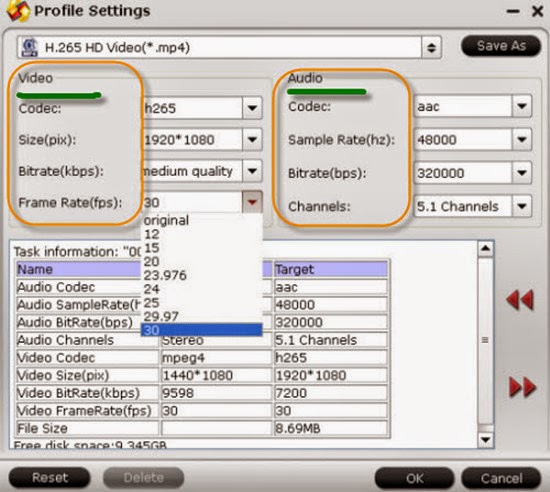
Step 3. (Optional Functions) Generally speaking, the default settings will ensure you a good balance between file size and image quality. But you can still click ‘Settings’ button to modify video and audio settings like codec, resolution, bit rate, frame rate, sample rate, and audio channels in your own way.
When ready, click ‘Convert’ button to begin format conversion. As soon as the conversion is complete, you can click ‘Open Folder’ button to get the generated MOV files that are ready for playing with VLC, QuickTime, Windows Media Player, and Playback Pro. Welcome to comment below if you still have other issues when you have tried this way of playing Canon XC10 MXF recordings to VLC, Windows Media Player and Playback Pro for watching.
Read More:
- MXF & FCP X Workflow: Help Importing MXF into FCP X
- Video Solution: Edit XDCAM MXF in Adobe Premiere Pro CC
- Import Panasonic HVX2000A MXF Files to Avid MC for Editing
- Import Canon C300 Mark II 4K MXF to iMovie on Mac
- Convert Panasonic AJ-HPX2700 P2 MXF to Avid/Premiere/Sony Vegas Pro
- How to Convert Camcorders MXF to any formats on Mac (macOS 10.12 Sierra included)