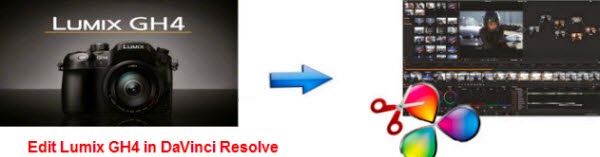
‘Hello, guys! In order to make a high-definition recording of my brother’s wedding, I have chosen Panasonic Lumix GH4 to record the moment. However, when I wanna import the videos to DaVinci Resolve for editing, it showed error. I have only used DaVinci Resolve for a long time so is there any answer to solve this problem?’—From a customer.
Hot Search: MXF to DaVinci | MP4 to DaVinci Resolve | MTS to DaVinci Resolve
Although DaVinci Resolve 11 can handle much more native video formats and camera files than any other real time editing system, it doesn’t mean that you can import every piece of video into this world famous color corrector and amazing editor, including Panasonic 4K videos. Here is an article about the main video formats that fails to be edited in DaVinci Resolve. But today I will show you an efficient way to realize your hope. Can you trust me?
Pavtube HD Video Converter for Mac - a friendly 4K video converter to make your wedding footage accepted by DaVinci Resolved for editing from 4K to the best supported format Avid DNxHD MOV. What’s more, other functions you’ll find in following steps.
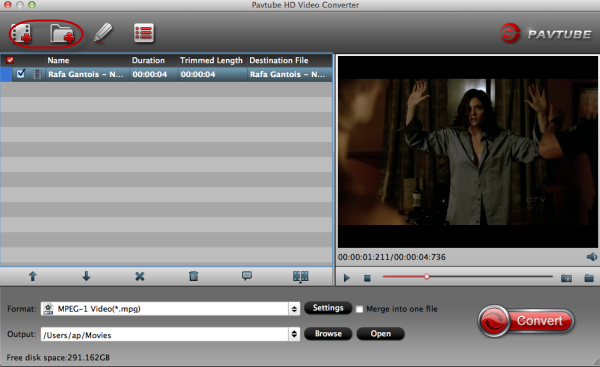
Step 1.Import your files with ‘Add Videos’ or ‘Add From Folder’ button.or on the other way, just drag your files in is not a bad idea for us.
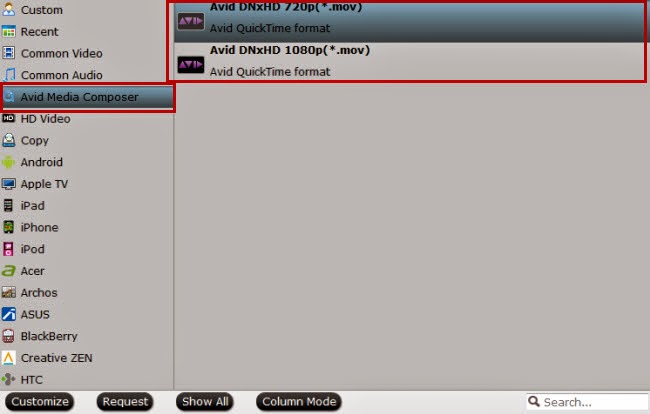
Step 2.As is mentioned above, Avid DNxHD is well supported by DaVinci Resolve 11. So just click the format bar to follow “Avid Media Compose” > “Avid DNxHD 720p (*.mov)” or “Avid DNxHD 1080p (*.mov).”
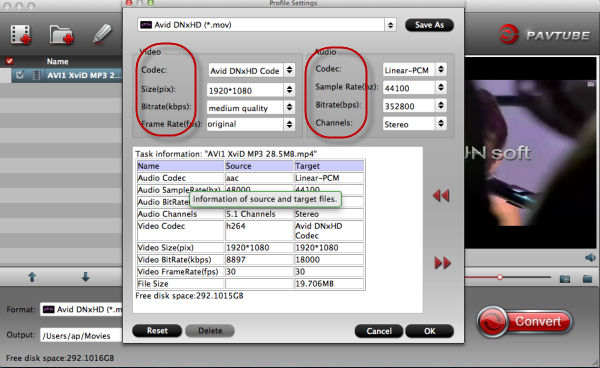
Step 3. One button called ‘Settings’ can offer you more. Such as for vdieos and audio parameters, we can find more there to do with our output files. Would you like to have a try?
Step 4. ‘Click “Convert” on main interface to start conversion
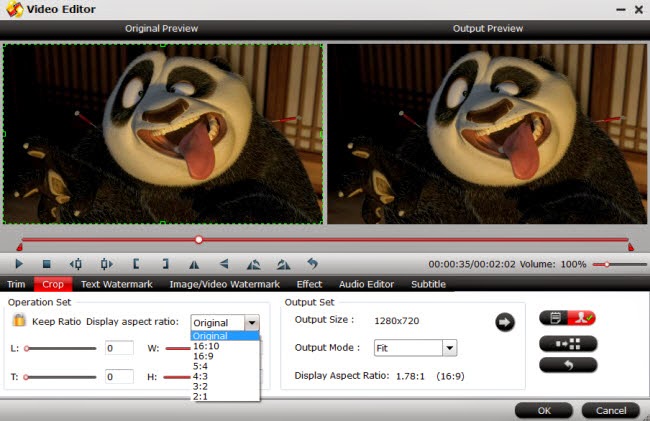
Additional Tip: Before importing output videos to DaVinci Resolve 9 for professional and further editing, you can use the video editor designed in this video converter to edit your 4K videos. Click “Edit” to get to the “Video Editor” interface, and edit your videos by trimming (get/cut off video clips), cropping (remove unwanted areas), adding text/image/video watermarks, inserting subtitles, adding special effects, etc.
It’s a pleasure if we have indeed helped you in this discussion. After transferring videos in DaVinci Resolve as ususal, are you now still have any troubles of importing Panasonic Lumix GH4 4K Videos to DaVinci Resolve 9? Let's have a try!
More guides: