Thursday, July 28, 2016

Convert Typhoon-H 4K recordings to Gopro Studio

About GoPro Studio:

As one of the main products that are provided by the GoPro, GoPro Studio software has made all the things easy to do whether it is importing the GoPro media and other video, playback videos, viewing videos/photos, creating professional quality videos, speeding it up or slowing it down, crop, and making image adjustments (like removing the fisheye lens distortion, or adjusting color or contrast)

About Editing Typhoon-H 4K Videos in GoPro Studio:

Before you begin:

Make sure you've downloaded and installed GoPro Studio for Windows or GoPro Studio for Mac.
Import videos from Typhoon-H to your computer

1. Import and convert files for the project

First, you have to import the video files you recorded. To do this, open GoPro Studio and click on the blue Import new files button in the top left corner. Choose the files you want to include and hit Open.

Before you begin assembling the video, you can already start cutting any unnecessary sections that you want to delete. Click on one of the thumbnails in the left column and then on Play, in the bottom center, to start watching the clips.

On the left you'll see two play buttons: you can use these to select sections of the file that you want to keep. The one on the left will determine the beginning of the clip, while the one on the right sets the end of the clip. You can choose several clips for one single movie.

Select segmentsUse the Advanced settings button to change the video settings. You can choose the video size and frames per second, increase the speed of the video, change the format, adjust the quality, or remove the "fish eye" effect typical of Typhoon-H 4K videos. Select the last option, Remember Settings, to make sure that the program will remember the settings you've chosen for the next video you want to edit. Press OK.

To move the video to the conversion list, click Add Clips to conversion list (1) in the bottom right of the screen. Repeat these steps for all the videos you'd like to add, although you can go back and add more videos during the editing phase by pressing on the Import & Convert tab at the top. When you're done and your video files have been added to the right column, click on Convert to (2) below.

When the videos are ready to be converted, the Proceed to step 2 option will appear at the bottom right of the screen. Click it to move on to the next step.

Step 2. Edit the video

Next, add the video. Select the video you want to import first, and again drag and drop it to the timeline next to the clip you added earlier. In the right column, you can adjust various parameters such as the speed of the video, the duration of the fade, the audio levels, white balance settings, and the frame. At the bottom, there are also presets to give it a vintage or night vision feel.

Step 3. Export video

When you've finished editing the video, all you have to do is export it by clicking on the Export tab. Next, a window will open, where you can choose which video format you want to export it to. There are lots of video types, each suitable for different needs and devices.

If, for example, you want to upload it on to YouTube, you have to choose the first option. If you want to see it on your computer or project it onto your TV at home, you need to select 1080p HD . Through the Custom option, you can set the parameters that you want. Once you've decided on them, hit Export.

About Gopro Studio Formats:

Before editing Typhoon-H 4K videos in GoPro Studio, you may ask "What Type of Media Files Can I Add to a GoPro Studio Project?". According to GoPro Studio support website, GoPro Studio has strict requirements of video formats, it only supports some videos.

Convert Typhoon-H 4K to Gopro Studio formats on Windows (Windows included)

The best software : Pavtube Video Converter

This 4K video app is also professionalized in converting Typhoon-H 4K videos in all formats, (read compress Typhoon-H 4K to 1080p) including (4K) MP4, MTS, MXF, AVI, MKV, FLV, MPG format and make them best compatible with YouTube, Facebook, Vimeo, Final Cut Pro, iMovie, Sony Vega Pro, Galaxy Tab, iPhone, iPad and more video sharing websites, professional editing programs and portable media devices. As an all-in-one video converter, player and editor, the smart tool allows you to trim Typhoon-H 4K to cut off unwanted parts, merge separate videos into one, crop video file size to remove the black bars, add image/video watermark to protect video, apply special rendering effect, etc. If you are running on Mac, Pavtube Video Converter for Mac is right for you.

Download the program and follow the step-by-step guide below to see how the workflow look like.


Other Download:
- Pavtube old official address: http://www.pavtube.com/video_converter/
- Amazon Download: http://download.cnet.com/Pavtube-Video-Converter/3000-2194_4-75734821.html
- Cnet Download: http://download.cnet.com/Pavtube-Video-Converter/3000-2194_4-75734821.html

Start Converting Typhoon-H 4K video to Gopro Studio format quickly

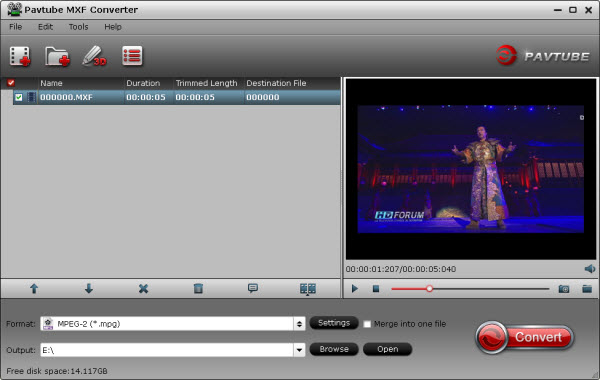
Step 1: Input Typhoon-H 4K video files.

From “File” drop-down menu, select “Add Video/Audio” to import files to the software for conversion.


Step 2: Specify output file format.

Click “Format” bar, from its drop-down selection, define “MOV – QuickTime (*.mov)” as the output profile format.


Step 3: Transcode files to QuickTime MOV format.

Carry out video to QuickTime Conversion process by clicking the right-bottom “Convert” button. When the conversion is over, click “Open” on the main interface to locate the converted files to transfer and import into the GoPro Studio without any problem.

Read More: 

Monday, July 25, 2016

Adjust Typhoon-H 4K to 1080p for playing/editing/sharing

About Typhoon-H

AT THE TOP of the bustling consumer drone marketplace, two big names have been battling (sometimes litigiously) for dominance. DJI popularized drone flying as a hobby with its Phantom line, but lately, Yuneec has been whittling into DJI’s marketshare with its competing Typhoon line. Both company’s flagship quadcopters are equipped with excellent video cameras, both are accessibly priced, and both have autonomous and safety-minded features that make flying easy for inexperienced pilots.

The Typhoon H is much more consumer-friendly. It bundles a very nice 4K video camera (shooting 30fps or 60fps in 1080p, and featuring 12-megapixel stills) and flies just fine with only one person at the controls. It can also be paired with a second controller though, which opens up the possibility of separate pilot and camera, something not easily done with any other similarly-priced drone on the market.


Why Downscale Typhoon-H 4K to 1080p?

While 4K Ultra HD is being in vogue nowadays bringing us marvelous viewing experiences, you could enjoy many amazing 4K UHD videos online shot by the new Typhoon-H. Nonetheless, many people are still struggling to compress and convert 4K to 1080p HD. Why? Probably because of following reasons:

One: 4K video file (4096 x 2160) is not compatible with most media players and mobile devices now, on the contrary, 1080p HD (1920 x 1080) works fine and can be widely played on VLC player, Windows Media Player, iPhone, iPad, Samsung, HTC etc.

Two: 4K videos are not supported by popular editing software like Premiere Pro, Avid Media Composer, Sony Movie Studio, DaVinci Resolve, Pinnacle Studio 17/16/15/14, Windows Movie Maker etc.

Three: It is cumbersome to edit 4k videos and upload 4k videos to video sharing sites like YouTube, Facebook, etc. because of its big file size and high definition.

...................

So in many cases, you may still need to convert Typhoon-H 4K video to 1080p for playing on media player/editing/sharing and more usages. Here we'll introduce you the fastest 4K video converter to help you easily accomplish the Typhoon-H 4K 4K to 1080p conversion compression task.

How to Downscale Typhoon-H 4K to 1080p with the easiest way?

To achieve converting and downscaling Typhoon-H 4K to 1080p, all you need is professional 4K to 1080p converter. Pavtube Video Converter is such a helpful and powerful 4K video converter receiving global acclaim. This first-class HD video converter is capable of converting any Typhoon-H 4K video to 1080p with the highest quality and a 6x faster real time converting speed with its built-in High Quality Engine, Multi-core CPU (utmost 8) and hardware acceleration including Intel QSV, Nvidia CUDA/NVENC tech, etc.

What's more, this stellar 1080p video converter compressor can also convert and reduce 4K video to 1080p HD in AVI, MP4, XAVC, H.265, WMV, MOV, FLV, MKV, M2TS etc; compress videos to editing software, iPhone 7/6S/6S Plus/6, iPad, Samsung, HTC and other 250+ preset profiles, so as to realize easy playback of 4K videos on any media player and mobile device. Advanced video editing functionality like customizing the video audio bit rate, video resolution, frame rate and changing aspect ratio are also accessible with this 4K video converter in the process of downsizing 4K UHD videos to 1080p. Finally, it is perfectly compatible with Windows 10/8/8.1//7, etc.

3 Steps to Downscale Typhoon-H 4K to 1080p with Pavtube Video Converter

1. 1. Download the free version of Pavtube Video Converter (Win version/Mac version) from the Internet then fire it up.

Win: 


Other Download:
- Pavtube old official address: http://www.pavtube.com/video_converter/
- Amazon Download: http://download.cnet.com/Pavtube-Video-Converter/3000-2194_4-75734821.html
- Cnet Download: http://download.cnet.com/Pavtube-Video-Converter/3000-2194_4-75734821.html

Mac: 


Other Download:
- Pavtube old official address: http://www.pavtube.com/video-converter-mac/
- Amazon Store Download: http://www.amazon.com/Pavtube-Video-Converter-Mac-Download/dp/B00QIBK0TQ
- Cnet Download: http://download.cnet.com/Pavtube-Video-Converter/3000-2194_4-76179460.html

Nex i will take the Windows as an example, and the Mac version is same with it. Just follow the guide to compress 4K to 1080p on Windows.

2. Once you have it, click the “Add File” in order to load your 4k videos files which you want to compress to whatever format you want.


3. In this case, you want your 4k video to be compressed to a 1080p video. While that’s the case, you have to select the 1080p output format and then choose the resolution which you desire from the window for parameter settings.

Click the "Format" drop down list to select a proper video foramt as you want. This video converter provides optimal profiles for kinds of editing programs and media devices, and you can also select a proper profile like HD Video > H.264 HD Video(*.mp4) or Common Video > MP4 as output format that best meets your needs.


Click "Settings" button; you can adjust video and audio settings, including codec, aspect ratio, bit rate, frame rate, sample rate, and audio channel. To down-convert ultra HD 4K to 1080p/720p, do remember adjusting video size to 1920*1080 or 1280*720.


4. Start 4K to 1080p/720p Conversion

Hit "Convert" button to start downscaling 4K to 1080p/720p. It would take several minutes due to the file size. You can set "Shutdown converter after conversion" to do your other work. After the conversion, click Open to locate the generated 1080p/720p video.

Read More: 

Thursday, July 21, 2016

Solution for importing Phantom 3 Advanced videos to Premiere Pro

The Phantom 3 Advanced has been certified by Apple in their Works with iMovie and Works with Final Cut Pro X, Premiere Pro programs, so you can edit 4K/HD/SD without worry whether you are a professional or shooting for fun. But many users still encounter the Phantom 3 Advanced videos to Premiere Pro importing issue. Why? This article will show you the solution for importing Phantom 3 Advanced MP4/MOV videos to Premiere Pro friendly format for editing.

Please look at the a format that listed all formats supported by Adobe Premiere Pro CC/CS6/CS5: 


It clears shows that MP4 file codec compatible with Adobe Premiere Pro CC/CS6/CS5 is just QuickTime Movie and XDCAM EX, while Phantom 3 Advanced recorded MP4 files with H.264 video (AVC) and AAC audio codecs used in Phantom camera is not supported. And Premiere Pro only support the QuickTime movie format. So you cannot import Phantom 3 Advanced MP4/MOV video into Adobe Premiere Pro for editing on Mac directly.

How to solve Phantom 3 video and Premiere Pro compatibility issue?

In order to edit GoPro videos perfectly with Adobe Premier Pro CC/CS6/CS5, you need a third-party video convert software to help you transcode Gopro MP4 clips into Adobe Premiere Pro friendly format. Below are two effective solutions for you. (read how to downscale Phantom 3 4K to 1080p/720p

Tool: Using Pavtube Video Converter for Mac (read review)

Pavtube Video Converter for Mac is highly recommended to you. This powerful Gopro video converter to Adobe Premiere Pro CC/CS6/CS5 can help you:

- Read Phantom 3 all drones like Phantom 3 Advanced, Phantom 3 Standard, Phantom 3 Professional etc.

- Effortlessly convert Phantom 3 video to Adobe Premiere Pro CC/CS6/CS5 certificated video format like MPEG-2, MOV or WMC without quality loss at fast speed.

- Make it possible to play or edit Phantom 3 with a wide variety of multimedia devices or applications apart from Adobe Premiere Pro CC/CS6/CS5 like iPad, iPod, iPhone, Apple TV, PSP, PS3, Wii, Zune, Xbox, Gphone, Samsung TV, Samsung mobiles, etc.

- Export Apple ProRes, AIC, DNxHD, which are compatible well with Final Cut Pro, iMovie, FCE, Avid Media Composer and more NLE systems for you edit immediately.

- Personalize Phantom 3 Advanced video by cropping, trimming, splitting, merging, adding watermark or special effects, inserting subtitles, adjusting brightness or contrast, etc.

Download and get the best Phantom 3 Advanced videos to Premiere Pro converter:


Other Download:
- Pavtube old official address: http://www.pavtube.com/video-converter-mac/
- Amazon Store Download: http://www.amazon.com/Pavtube-Video-Converter-Mac-Download/dp/B00QIBK0TQ
- Cnet Download: http://download.cnet.com/Pavtube-Video-Converter/3000-2194_4-76179460.html

Follow the step-by-step guide, you can ingest Phantom 3 Advanced videos to Adobe Premiere Pro CC/CS6/CS5 for editing

Step 1. Creat a folder for saveing Phantom 3 videos

Launch Phantom 3 video converter on your Mac. Create a folder with the original Phantom 3 advanced video on your hard drive.

Step 2. Load Phantom 3 videos

Choose all the Phantom 3 videos in your folder, drag & drop or through File > "Add Video/Audio" button/"Add from folder" button to import source Phantom 3 advanced videos into the video converter interface.


Step 3. Choose proper output format Premiere Pro preferred

Click "Format" pull down list to select "Adobe Premiere/Sony Vegas> MPEG-2(*.mpg)" as the best video format for Adobe Premiere Pro CC/CS6/CS5. Another two specialized formats "WMC (VC-1) (*.wmv) and "MOV (AVC) (*.mov)"are the good choice as well.


Step 4. Set Advance Settings (Optional)

If you want to customize video and audio encoding settings to get the best quality you want, just click the "Settings" button to customize the output video/audio resolution, frame rate, bit rate, etc.

Step 5. Start converting Phantom 3 videos to Premiere Pro

Click "Convert" button to start transcoding Phantom 3 videos to MPG/MOV/WMV for Adobe Premiere Pro. When the conversion task is finished, you can get the exported files by click the "Open" button for importing to Adobe Premiere Pro CC/CS6/CS5 to do further editing on Mac.

Read More: 

Monday, July 18, 2016

Exporting from Phantom 3 Standard to edit in Final Cut Pro

Part 1. PHANTOM 3 STANDARD SPECS

Video Recording Modes
2.7K: 2704 x1520p 24/25/30 (29.97)
FHD: 1920x1080p 24/25/30
HD: 1280x720p 24/25/30/48/50/60

Video: MP4, MOV (MPEG-4 AVC/H.264)

Part 2. Can I Import Phantom 3 Standard MP4/MOV to FCP?

FCP supported format:

File Formats Supported by Final Cut Pro

  • Video Formats: Apple Animation codec, Apple Intermediate codec, Apple ProRes(all versions), AVC-intra, AVCHD (including AVCCAM, AVCHD Lite, and NXCAM), DV (including DVCAM, DVCPRO, and DVCPRO50), DVCPRO HD, H.264, HDV, iFrame, Motion JPEG(OpenDML only), MPEG IMX(D-10), REDCODE RAW (R3D), Uncompressed 10-bit 4:2:2, Uncompressed 8-bit 4:2:2, XAVC, XDCAM HD/EX/HD422, QuickTime formats. 
  • Audio Formats: AAC, AIFF, BWF, CAF, MP3, MP4, WAV 
  • Container format: 3GP, AVI, MP4, MXF, QuickTime 
  • Still-image formats: BMP, GIF, JPEG, PNG, PSD, RAW, TGA, TIFF 


Best Video/Audio Settings for Final Cut Pro 

  • Aspect Ratio: Native aspect ratio without letterboxing (examples: 4:3, 16:9) 
  • Resolution: You can choose different resolutions, all the way to 5K. The lowest resolution supported is 640 x 480. You cannot choose custom resolutions or aspect ratios. This is a huge negative. 
  • Frame Rate: The lowest frame rate possible is 23.976p, and the maximum is 60p. No 12 or 18 fps options. 
  • Audio Settings: Generally, audio only has 'Surround' or 'Stereo', and the maximum audio bit depth isn’t specified. Squence audio is always mixed using 32-bit floating-point values. Tips: Final Cut Pro allows you to directly import any audio file format compatible with QuickTime. However, only uncompressed file formats should be used for editing. 

Well, Final Cut Pro might not work with some Phantom 3 Standard MP4 and MOV files sometimes due to the codec issue or other reasons. In that case, you might try to find a way to convert MP4 and MOV to Final Cut Pro compatible format like Apple ProRes. This article here shows the Phantom 3 Standard MP4 and MOV to Final Cut Pro Mac conversion in details.

Part 3. Solution for Import Phantom 3 Standard MP4/MOV to FCP 6/7/X

Firstly, download a professional application to do the MP4 to FCP conversion. The one used in the article—say, Pavtube HD Video Converter for Mac —is outstanding in the features of easy-to-use and fast conversion speed. It supports optimized preset for Final Cut Pro which can work for Final Cut Express, too. With this feature, if you have no idea which target format you should choose for Final Cut Pro, you can directly select FCP as output qirectly, then the output video can work well on FCP. (read this best HD video converter for Mac review)

Hot search : 
Part 4. Encode Phantom 3 Standard MP4/MOV to FCP 6/7/X friendly format

Download and buy the best FCP video converter:


Other Download:

Step 1. Load Phantom 3 Standard files

The first thing you need to do is to open the application the load the necessary MP4 files onto it. You can do that either by using drag and drop or by accessing "File" -> "Load Files" and then add the desired files.

Step 2. Choose FCP compatible format

Go to "Format" bar and choose "Final Cut Pro Apple ProRes 422 (*.mov)" as output format for Final Cut Pro X/7/6.


Note: Apple ProRes 422 (HQ) have higher qualities. Apple ProRes 422 (LT) and Apple ProRes 422 (Proxy) have smaller sizes. You can choose according to your requirement.

Step 3. Downscale 4K to 1080p

Click the "Settings" button and customize proper video/audio parameters including Video size, bitrate and fame rate and more. In size box, input 1920x1080 so that you can successfully edit Sony PXW-FS5 video in FCP.

Tip: If you just want a certain clip of Phantom 3 Standard video, you can click "Edit selected task" button on the top menu. There, you can trim video footage.

Step 4. Start Phantom 3 Standard video to ProRes conversion

Click the "Convert" button at the bottom right corner to start transcoding Phantom 3 Standard MP4 or MOV video for FCP. After conversion, you can import converted video clips into Final Cut Pro X/7/6 to create the end results that you want.

If you did it as the steps, you will need to worry that you can't edit your Phantom 3 Standard video in FCP any more. Now, you can shoot as many videos as you want with the Phantom 3 Standard.

Important note: If you are also a FCP X user, before you try to do the conversion, don't forget to make sure that you have installed the Apple ProRes Codec manually since the FCP X asks users to install it by themselves.

Read Related Articles:

Thursday, July 14, 2016

Sony Vegas Movie Studio support MXF?

Sony Vegas Movie Studio is a consumer-based nonlinear video editing software designed for the PC. It is a scaled-down version of Sony Vegas Pro. What do 4K, XAVC S, stereoscopic 3D, AVCHD footage have in common? They can all be edited in the same Movie Studio project. But Sony Vegas Movie Studio can't handle all the video formats, such as MXF.

Sony Movie Studio supported formats: 

AAC, AA3, AIFF, AVI, BMP, CDA, FLAC, GIF, JPEG, MP3, MPEG-1, MPEG-2, MPEG-4, MVC, OGG, OMA, PCA, PNG, QuickTime?, SND, SFA, W64, WAV, WDP, WMA, WMV, XAVC S

To fix the Sony Vegas Movie Studio MXF incompatibility problem, a more practical way recommended online is to transcode MXF to a more editing-friendly format for Sony Movie Studio. Once you have, you can add them to Sony Movie Studio (13) and use MXF like any other file Sony Movie Studio supports. After testing Handbrake, I found the output videos workable in Sony Movie Studio, but it seems heavy quality loss after conversion. Finally, I pick Pavtube MXF Video Converter which is an easy-to-use yet powerful high-quality video converter, player and editor. (read review)

Besides, this powerful video converter also can convert MXF and other videos to Vegas Pro, Pinnacle Studio, Windows Movie MakerCyberlink PowerDirectorAvid Media Composer, Adobe Premiere Pro, iMovie and more NLE supported format on Windows. What's more, with its built-in Editor, you can crop, trim, add effects, subtitles to your .mxf files as you need. Follow the guide below, you will be able to make Sony Vegas Movie Studio read MXF files with ease in few minutes.


Transcoding MXF for Editing in Sony Movie Studio

Step 1: Load source MXF files

Install and run the MXF to Sony Movie Studio Converter. After that, click "Add Video" button to locate the MXF files. You can also directly drag and drop your MXF video files to the program. You can add multiple video files to convert at a time.

Step 2: Set Sony Movie Studio supported video format

Click on the drop-down button on the right side of the "Format" to set Sony Vegas Movie Studio compatible video "WMV (VC-1) (*.wmv)" or "MPEG-2 (*.mpg)" as output video format from "Adobe Premiere/Sony Vegas" Category. To import high definition MXF video like 4K, 1080p to Adobe Premiere/Sony Vegas, select WMV HD, AVI HD, or MPEG-4 HD from "HD Video" Category.


Step 3: Convert MXF to Sony Movie Studio compatible video

Hit the "Start conversion" button and this Video Converter will transcod MXF to Sony Movie Studio rapidly. After the conversion, simply click "Open" to get the converted MXF videos, and then drag them to the timeline of Sony Movie Studio. It's that easy to solve "Sony Movie Studios can't import, read, open, recognize or accept MXF" issue.

Read More: 

Monday, July 11, 2016

MXF files not importing into Vegas Pro Why?

“I just bought a new Panasonic AJ-PX270 camera today. The camera creates .MXF files that Vegas Pro 12 will not recognize. I'm praying I'm not gonna have to convert these files for Vegas to read them? I wanted to drop the files natively into Vegas without any headaches with conversions. Can this be done? Does anyone know of a solution? I'd sure appreciate one!!”

“Anybody can help? When I loaded an MXF file from my Sony PMW-100 to Sony Vegas 11, Vegas just crashed. The other video like AVI works in Vegas perfectly.”

“I have some video clips from my Canon XF105 Camcorder. Now I want to import the MXF files to Sony Vegas Pro 11.0 to edit them up, put background music, add some subtitles and narrations, etc. But when I try the importing, Vegas says MXF is an unknown format or incompatible. Is that normal?” 


MXF (Material eXchange Format) is a container format for professional digital video and audio media defined by a set of SMPTE standards. The video format is created specifically for HD digital camcorders like Canon C300, Canon XF100, Canon XF105, Sony XDCAM series and Panasonic P2 series. Although Sony claims Vegas Pro can work with MXF format, many folks are encounterring similar problems when they tried to import and open MXF files in Sony Vegas Pro (Vegas 13 included). To fix the problem, the realiable workaround we've found so far is to transcode MXF to a fully compatible format with Sony Vegas Pro. Along with some help from third-party programs, you can achieve your goal smoothly. This will help you import the file correctly and save the rendering time.

Below is the entire process to convert MXF to MPEG-2 for Sony Vegas Pro using Pavtube MXF Video Converter By running it, there's no need to set the codec yourself: the program has optimized presets for Sony Vegas. With it, you can do batch conversion from MXF to Sony Vegas compatible video format without quality loss. (read review)

Hot search: 

Free Download or Purchase Pavtube MXF Video Converter:


How to encode MXF files to Sony Vegas compatible format with fast speed?

Step 1. Load MXF files

Install and launch the Pavtube MXF Video Converter and add MXF files to it. Click "Add video" button to load MXF files. Or directly drag and drop the source MXF file you want to the sftware. Then you can preview the whole videos in the preview window on the right.


Step 2. Choose Sony Vegas Pro format

Click "Format" option to choose the output format. To make your Sony Vegas Pro 13/12 to read MXF files, just choose the most Sony Vegas accepted "WMV (VC-1) (*.wmv) or MPEG-2 " under "Adobe Premiere/Sony Vegas" option as output format.


Step 3. Encode MXF to Sony Vegas

Hit the "Convert" button at the bottom right corner to start encoding MXF to Sony Vegas. Once finished, hit "Open" button to get the generated files, and then drag it to the Vegas Pro timeline or into the Trimmer window where you can mark you in and out points before you add it to the timeline.

Read More:

Thursday, July 7, 2016

Import Canon MXF footages to Cyberlink PowerDirector for editing

As we all know, for the compatibility issue, many MXF Camcorder users have the experiences with Plug-in or MXF converter. From googling, we found many users often met some problems if they tried importing Canon MXF clips like Canon C300 Mark II MXF to Cyberlink PowerDirector, and they wanted to get a way to help them to solve the troubles. In the post I will share free or paid tools to import Canon MXF recordings to Cyberlink PowerDirector for further editing on Windows.

The fact is Cyberlink PowerDirector does not support MXF format. To fix the PowerDirector and MXF importing issues, (no matter PowerDirector 13/12/11/10 or other verison), you have to convert MXF files to PowerDirector friendly format first. Cyberlink PowerDirector work with MPEG-2 files perfectly.

Actually, it's not as difficult as you imagine. To prepare MXF for use in PowerDirector, what's need is a just a common video converter like Pavtube MXF Video Converter. It supports creating high quality MPEG-2 video for your PowerDirector, no matter what's the format of your source video files. What's more, it also supports MXF formats of videos to seamlessly fit Sony Vegas, Pinnacle Studio, Adobe Premiere, Avid Media Composer, Windows Movie Maker, etc. editing softwares. Just download it and follow the simple guide to achieve your goal. (read top 5 MXF video converter review)

Downlaod and buy the best MXF Video converter:


A Guide to Convert MXF to Cyberlink PowerDirector format

Step 1. Import MXF

Either click "Add video" to import your local recording files or directly drag & drop MXF files to the PowerDirector video converter (The added files will display as thumbnails on the left side of this app).

Step 2. Choose MPEG-2 as the output format

This app directly offers you MPEG-2 in its format window. You can select it as the output format directly. To do it, you can click Output Format panel of the main interface and go to "Adobe Premiere" > "MPEG-2 (*.mpg)″ in the pop-up window. (Note: MPEG-2 is usually used in Digital Television set top boxes and DVD which can be recognized by Cyberlink PowerDirector.)


Step 3. Start PowerDirector video conversion

Click the "Convert" button at the bottom-right corner of this app's main interface to convert MXF to MPEG-2 for PowerDirector. Now, the interface will be shown as follows. The green bar represents video conversion progress. So you can clearly know when the conversion will be done. By the way, the conversion speed is ultrafast, thanks to its leading NVIDIA CUDA and AMD APP acceleration technology.


Read Guides about video to PowerDirector:
Read Guides about MXF to NLE:

Monday, July 4, 2016

The Best Summer 1080p HD Video Converter for Windows/Mac

Are you looking for the best 1080p HD video converter that supports all 4K, 2K, 1080p and 720p videos? Or you just need a free 1080P HD video converter that'll let you fully convert a Summer 1080P HD video clip (camera recordings, downloaded videos etc) to 720P or convert Summer vacation 4K videos to 1080p videos on PC and Mac without it crashing?

Q - “I want to a 1080p HD video tool to convert my 1080p movies to my iPad, how to ?”

Q - “How do I convert videos into 1080p HD but have the same or even better quality video than before? Is there some software or something to do this? Please help!!!”

Q - “What is the best 1080p to 2160p video converter?”

Q - "I want to compress and convert 4K videos to 1080p files without loss of quality, but it seems most converters do not support videos with 4K ultra high definition. Has anyone got some professional 4K video converters and tutorials for me? How to convert 4k to 1080p/720p?" 


Q - "Is there a 4K video converter that can convert 4K videos for free? I downloaded some 4k video clips with different file formats and want to transfer to my iPhone 6 32GB. So I need the best 4K video converter to do this job. I searched through the web but don’t know which one is to choose." 

As you seen, many people have the problems in converting Summer 1080p video to popular format or convert 4K to 1080. Now worry, read on to get the best 1080p video converter to help you solve the issues.

Hot search:


Part 1. Convert any 1080p HD video like MP4, MKV, H.265, AVI, MOV etc

Would you like to watch the videos from the camera on your iPhone, iPad, Samsung, TV, PS3/PS3, Xbox 360, or edit them in popular editing tools like iMovie, Sony movie studio, Windows Movie Maker, Premiere Pro etc and not worry about video format compatibility? Now you can! Pavtube Video Converter will enable you to forget about technical details and convert any 1080p HD video to any format like MP4, MKV, H.265, AVI, MOV, M3U8, FLV and more 250+ formats in no time!

If you are a Mac user, you can get the powerful Pavtube Video Converter for Mac

Now firstly free download and buy the best 1080p video converter for Windows:


Other Download:
- Pavtube old official address: http://www.pavtube.com/video_converter/
- Amazon Download: http://download.cnet.com/Pavtube-Video-Converter/3000-2194_4-75734821.html
- Cnet Download: http://download.cnet.com/Pavtube-Video-Converter/3000-2194_4-75734821.html

How to Convert any 1080p videos to MP4, MKV, H.265, AVI, MOV etc?

Step 1. Click "Add video" button to add your video files to the program. Or directly drag the video you want to convert to the left item bar.


Step 2. Set right output format. Click "Format" bar, and select .mp4, .avi etc from "Common video" or "HD video" or “3D”. Or choose the best format from iPhone, TV, Premiere Pro etc.


Tips: The default settings may not satisfy you, and you can click the "Settings" button to change the settings by yourself including video resolution, bit rate, audio sample rate, audio channel etc. for full screen playback smoothly. Or keep no changes, which is also a good choice.

Step 3. Click the "Convert" button on the main interface and the software will start to convert to friendly video formats immediately. When the conversion finishes, click "Open" to find the converted video files. Then you can effortless transfer the video files to any devices or NLEs for playback or editing or others.

Part 2. Convert and compress 4K to 1080p for more usages

Maybe you will think HD has taken a new leap with ‘4k UHD’ offering higher than 1080p resolution. 4k UHD is mainly used in digital cinema with 4096x2160 as its pixel resolution or Ultra HD television with 3840×2160 as its resolution. The 4k technology allows the users to enjoy a very detailed screen of movies and videos which was not possible before. 4k being relatively new, there are not many devices that support 4k and rather limited options to play these videos in a 4k video player. Thus, compressing 4K 4096x2160 or 3840x2160 to HD 1080P/720P with a proper 4K converter is a must-have option.

To get the work done, Pavtube Video Converter is believed to get over the hurdles. Just like the way it is dealing with 1080p HD videos like convert 1080p to 720p, it is surely in the support of converting 4K UHD videos in any formats faultlessly in a flash.

It provides hundreds of output format presets for 4K videos to Apple ProRes, MPEG-2, WMV, MP4, AVI etc for better editing, playing, and sharing. This Ultra HD Video Converter is also available to customize the output resolutions to any size (4K, 2K, 1080p, 720p) the users want. For those who want to convert/downscale 4K videos on Mac (El Capitan included), please turn to Pavtube Video Converter for Mac. Here is an easy-to-follow tutorial and to downsize your 4K footage to 1080p/720p video effortlessly.

Now firstly free download and buy the best 4K to 1080p video converter for Windows:


Other Download:
- Pavtube old official address: http://www.pavtube.com/video_converter/
- Amazon Download: http://download.cnet.com/Pavtube-Video-Converter/3000-2194_4-75734821.html
- Cnet Download: http://download.cnet.com/Pavtube-Video-Converter/3000-2194_4-75734821.html

How to Compress/Convert 4K UHD Video to 1080P/720P HD?

STEP 1. Import 4K files

After the installation, launch the 4K Converter; click "Add video" and load your 4K videos. This program supports batch conversion, so you can add multiple files into it at a time.


STEP 2. Choose Output Format

Click the "Format" drop down list to select a proper video foramt as you want. This video converter provides optimal profiles for kinds of editing programs and media devices, and you can also select a proper profile like HD Video > H.264 (*.mp4) as output format that best meets your needs.


STEP 3. Downsize 4K Video Resolution to 1080p/720p

Click "Settings" button; you can adjust video and audio settings, including codec, aspect ratio, bit rate, frame rate, sample rate, and audio channel. To down-convert ultra HD 4K to 1080p/720p, do remember adjusting video size to 1920*1080 or 1280*720.

STEP 4. Start 4K to 1080p/720p Conversion

Hit "Start conversion" button to start downscaling 4K to 1080p/720p. It would take several minutes due to the file size. You can set "Shutdown converter after conversion" to do your other work. After the conversion, click Open to locate the generated 1080p/720p video.

Conclusion 

Now it would be easier for you to playback and edit your 1080P/4K clips anywhere you want them. As we mentioned earlier, in addition to convert 1080P/4K Ultra HD videos including 4K camera videos, and web downloaded 4K videos, this 4K converter software also works as a reliable 1080p video editor with some simple edit functions like cropping, splitting, adding effects, inserting subtitles, etc. Have fun!

Read More: