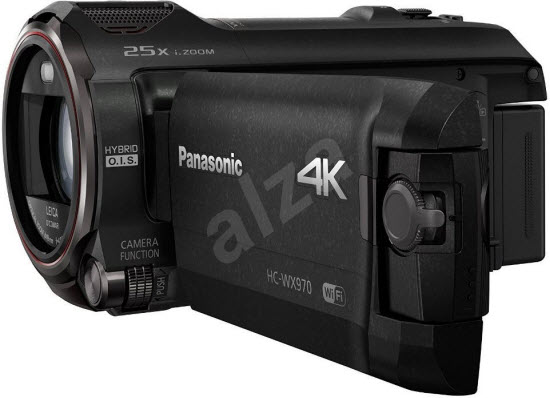
With Panasonic HC-WX970, you can elevate your creativity with 4K video. Enjoy great detail, HDR exposure and improved camera control with Level Shot Function and 5-Axis HYBRID O.I.S.+. After shooting some footage with Panasonic HC-WX970, you will get both 4K MP4 and AVCHD video, there is no doubt that you will need a professional video editing application to handle all those video clips.
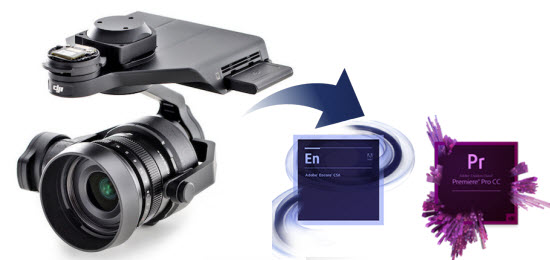
Adobe Premiere Pro CC, the industry-leading video production toolset now delivers a more streamlined way to help create professional productions with brilliant color, anywhere you are. From Adobe’s official website, we get the information that 2014 release of Premiere Pro CC enables you to work with the vast majority of formats natively — including 4K, 5K and 6K RED media, XAVC, ProRes, and DNxHD — without transcoding or file rewrapping. From this information, you will end up with failure if you try to import and edit 4K MP4 video captured with Panasonic HC-WX970 4K MP4 video with previous version of Premiere Pro. To make 4K MP4 video work well with old Premiere Pro CC, the best solution is downscale 4K MP4 to 1080p.
In regard to AVCHD workflow with Premiere Pro CC, most people will get no luck to import AVCHD video to Premiere Pro CC, the reason may due to codec incompatibility, large file size or other unknown reasons. How to fix this issue? Like other NLE editing tools, Adobe Premiere Pro CC has its own native editing codec, you will achieve a more fluent and fast workflow by transcoding Panasonic HC-WX970 4K MP4/AVCHD to Adobe Premiere Pro CC best compatible editing codec.
Here, you are recommended to download Pavtube MTS/M2TS Converter for Mac (Top 5 Mac MTS M2TS Converter Review) to directly output HC-WX970 4K MP4/AVCHD to Premiere Pro CC specially optimized file formats MPEG-2 or WMV on Mac OS X El Capitan.
Besides that, our application is also capable of encoding HC-WX970 4K MP4/AVCHD to other professional editing codec such as Apple Prores Codec for FCP 6/7/X, Apple Intermediate Codec for iMovie/FCE, DNxHD mov for Avid Media Composer, Sony Vegas/Premiere Pro/Premiere Elements/After Effects optimized file formats, etc.


Other Download:
- Pavtube old official address: http://www.pavtube.com/mts-converter-mac/
- Amazon Download: http://www.amazon.com/Pavtube-MTS-M2TS-Converter-Download/dp/B00QIE3U0Y
- Cnet Download: http://download.cnet.com/Pavtube-MTS-M2TS-Converter/3000-2194_4-76177029.html
How to import and edit Panasonic HC-WX970 4K MP4/AVCHD with Adobe Premiere Premier Pro CC?
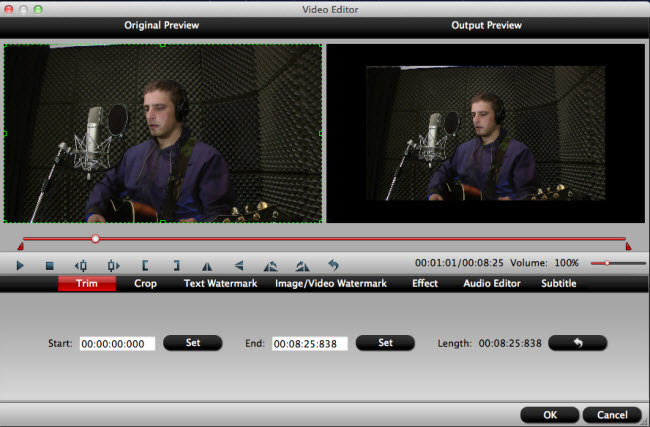
Step 1: Add HC-WX970 4K MP4/AVCHD video to the program.
Run the program, click “File” > “Add video/audio” to add HC-WX970 4K MP4/AVCHD videos to the program.

Step 2: Specify output file format.
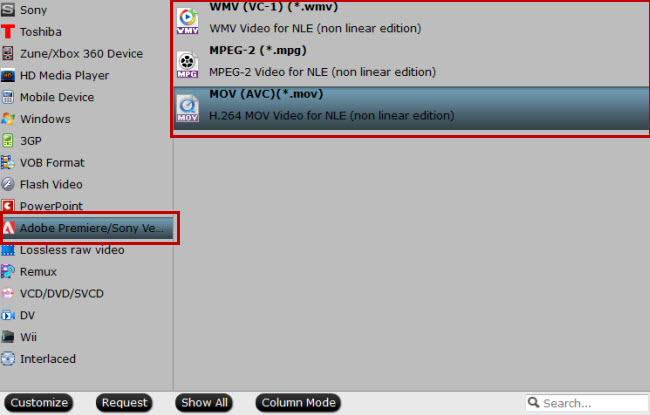
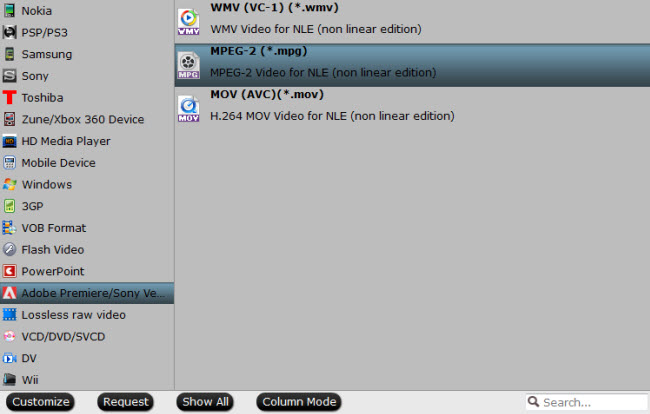
From "Format" drop-down list, select to out "Adobe Premiere/Sony V..."> "MPEG-2 (*.mpg)" format for editing with Avid Media Composer.

Step 3: Down-converting 4K to 1080p.
For smooth workflow of WX970 video with Avid Media Composer you are recommended to downscale 4K video to 1080p from “Size(pix)” drop-down selection.
Step 4: Carry out the conversion process.
Press right-bottom conversion button to start Panasonic HC-WX970 4K MP4/AVCHD to Premiere Pro CC conversion process.
When the conversion is complete, you can easily import converted videos to Premiere Pro CC for professional editing.
Further Reading:
Sony FS700 1080 50p/60p AVCHD workflow for Avid Media Composer
How to Edit Panasonic Lumix GX8 4K AVCHD/MP4 in Premiere Elements
How to Ingest HC-X1000 4K AVCHD MTS to iMovie 11/10/9?
Tutorial of Getting Panasonic GH4 4K Footage into iMovie
Downscaling Panasonic GH4 UHD 4K to 1080p mov video for editing in iMovie
In regard to AVCHD workflow with Premiere Pro CC, most people will get no luck to import AVCHD video to Premiere Pro CC, the reason may due to codec incompatibility, large file size or other unknown reasons. How to fix this issue? Like other NLE editing tools, Adobe Premiere Pro CC has its own native editing codec, you will achieve a more fluent and fast workflow by transcoding Panasonic HC-WX970 4K MP4/AVCHD to Adobe Premiere Pro CC best compatible editing codec.
Here, you are recommended to download Pavtube MTS/M2TS Converter for Mac (Top 5 Mac MTS M2TS Converter Review) to directly output HC-WX970 4K MP4/AVCHD to Premiere Pro CC specially optimized file formats MPEG-2 or WMV on Mac OS X El Capitan.
Besides that, our application is also capable of encoding HC-WX970 4K MP4/AVCHD to other professional editing codec such as Apple Prores Codec for FCP 6/7/X, Apple Intermediate Codec for iMovie/FCE, DNxHD mov for Avid Media Composer, Sony Vegas/Premiere Pro/Premiere Elements/After Effects optimized file formats, etc.
Other Download:
- Pavtube old official address: http://www.pavtube.com/mts-converter-mac/
- Amazon Download: http://www.amazon.com/Pavtube-MTS-M2TS-Converter-Download/dp/B00QIE3U0Y
- Cnet Download: http://download.cnet.com/Pavtube-MTS-M2TS-Converter/3000-2194_4-76177029.html
How to import and edit Panasonic HC-WX970 4K MP4/AVCHD with Adobe Premiere Premier Pro CC?
Step 1: Add HC-WX970 4K MP4/AVCHD video to the program.
Run the program, click “File” > “Add video/audio” to add HC-WX970 4K MP4/AVCHD videos to the program.
Step 2: Specify output file format.
From "Format" drop-down list, select to out "Adobe Premiere/Sony V..."> "MPEG-2 (*.mpg)" format for editing with Avid Media Composer.
Step 3: Down-converting 4K to 1080p.
For smooth workflow of WX970 video with Avid Media Composer you are recommended to downscale 4K video to 1080p from “Size(pix)” drop-down selection.
Step 4: Carry out the conversion process.
Press right-bottom conversion button to start Panasonic HC-WX970 4K MP4/AVCHD to Premiere Pro CC conversion process.
When the conversion is complete, you can easily import converted videos to Premiere Pro CC for professional editing.
Further Reading:
Sony FS700 1080 50p/60p AVCHD workflow for Avid Media Composer
How to Edit Panasonic Lumix GX8 4K AVCHD/MP4 in Premiere Elements
How to Ingest HC-X1000 4K AVCHD MTS to iMovie 11/10/9?
Tutorial of Getting Panasonic GH4 4K Footage into iMovie
Downscaling Panasonic GH4 UHD 4K to 1080p mov video for editing in iMovie