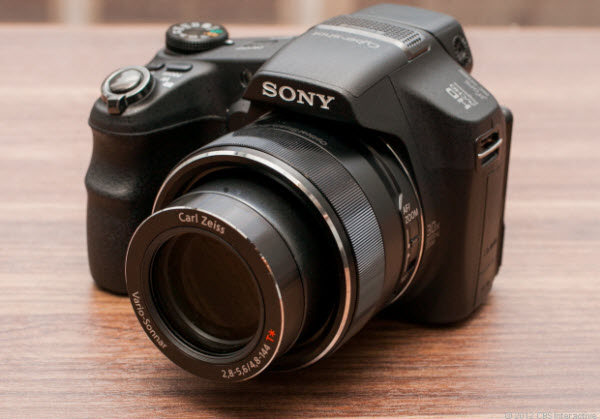
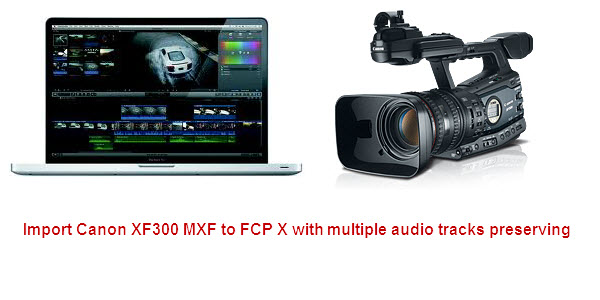
Sony Cyber-shot DSC-HX200V is a fast-shooting megazoom with excellent photo and video quality for its class, and plenty of shooting options to make casual and advanced shooters happy. Recently, I take some pictures with it of birds, try to capture flight and movement and want to select individual frames. I'm satisfied with the full HD Movie Shooting capability (1920×1080/60p) and Optical SteadyShot Active Mode.
However, My HX200V camera gave me videos as AVCHD file which I have not acknowledged with. I tried with both FCP, iMovie and quicktime, but none of them could recognize it. Is there any step-by-step work flow for this? Which software can convert video taken with my Sony HX200V Cybershot camera for working with my mac? PS: the footages are on 1080 60p.
In this case, I googled to search the solutions. I find this 60p MTS and M2TS video format is not friendly for use on Mac, Mac platform best supported format is .mov format. So I tried to seek for the best avchd converter for mac to do convertering. Now I get this MTS/M2TS Converter for Mac from Pavtube.
Here I will share the easy steps that you can follow to transcode Sony Cyber-shot DSC-HX200V 60p AVCHD MTS to MOV for using in FCP, iMovie and QuickTime Player.
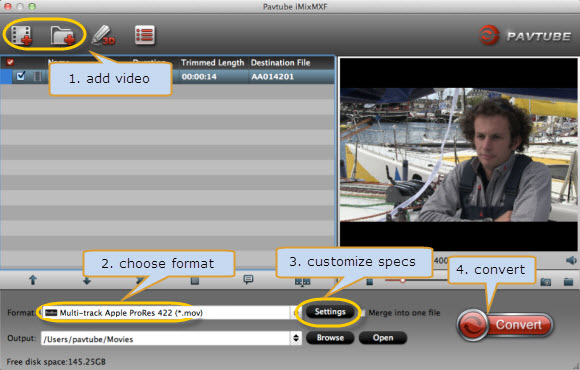
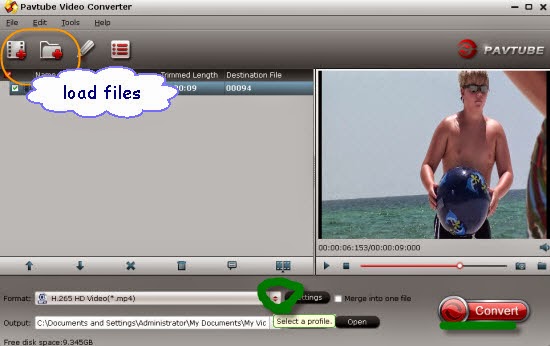
1. Install and run the best Sony 60p MTS Converter for Mac, it's an professional AVCHD to FCP/iMovie/QuickTime Converter which can convert Sony DSC-HX200V 60p AVCHD files to different formats on Mac (including OS X Mavericks 10.9). Click "Add Video" to load the 60p .mts files from Sony HX200V Camcorder to the Mac Converter.
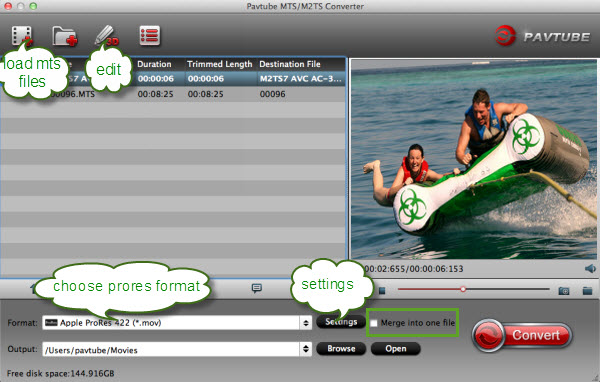
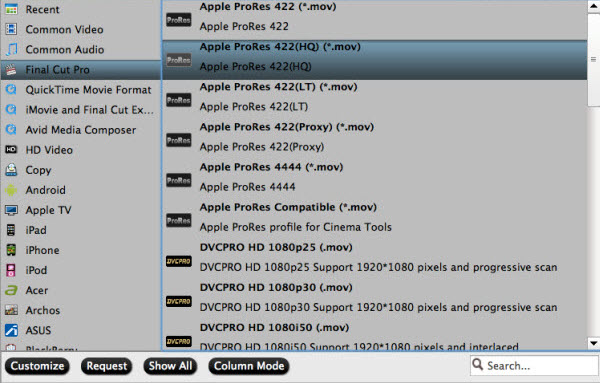
2. Click "format" bar to choose output format:
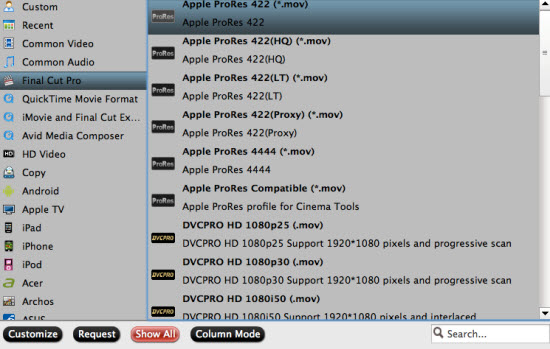
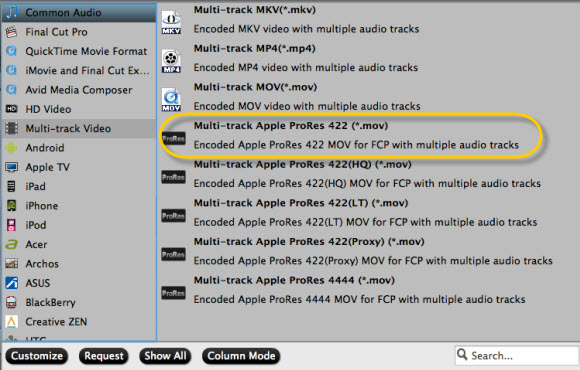
Choose "Final Cut Pro -> Apple ProRes 422 (*.mov)" as the best output codec for importing 60p MTS files to Final Cut Pro (X) editing.
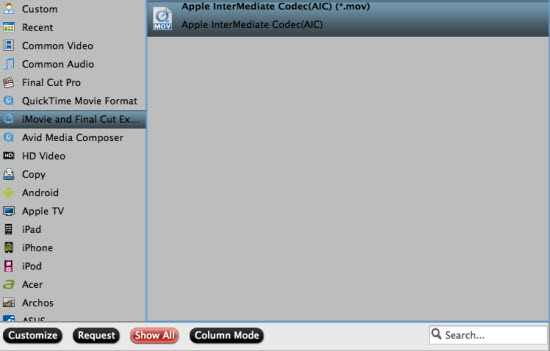
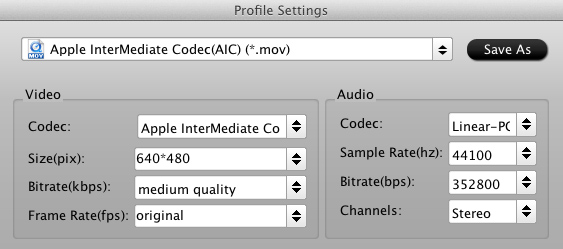
Choose "iMovie and Final Cut Express > Apple Intermediate Codec(AIC) (*.mov)" as the best video format for editing 60p AVCHD files to iMovie.
Choose "Common video -> MOV-QuickTime (*.mov)" to play Sony 60p AVCHD mts with QuickTime Player.

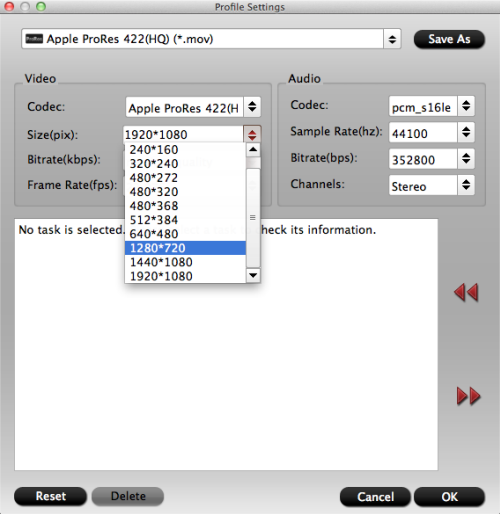
Step 4. You can click “settings” to customize the output parameters, adjust the resolution, bitrate as you want.
Step 4. You can click “settings” to customize the output parameters, adjust the resolution, bitrate as you want.
Tips:
If you would like to add Anaglyphic 3D effect or Subtitle for your footage, click "Edit" icon to start video editing with your 3D files, such as adding Anaglyphic 3D effect(Red-Blue, Red-Green) as well as adding watermark, trim your videos and so on.
You can also click "Subtitles" option, add srt, ass, ssa suntitle you want.
Step 5. Click convert button to start converting Sony HX200V 60p AVCHD MTS to Prores/AIC/QuickTime mov for FCP, iMovie editing and QuickTime Playere playback.
After the Mac MTS to MOV conversion, you can import the converted footages to FCP, iMovie and QuickTime Player for editing and playing smoothly on Mac.
Read More:
- How to Solve the freezes when importing MTS media to Premiere CC-2015.3?
- How to Convert MTS/M2TS with Handbrake Easily?
- Best Solution to Play Sony MTS/M2TS Files on MacBook Pro
- Play MTS on Smart TV (Windows and Mac Solutions)
- Top 5 MTS/M2TS Video Editors for Mac
- Top 5 MTS/M2TS Video Editors for Windows (10, 8.1, 8, 7, XP, etc)
- Fix Choppy Issues When Importing AVCHD Files to FCP
- Join and Convert MTS/M2TS Files for playing with VLC Player
- How to Convert 3D AVCHD MTS to 3D Tablet for Watching?


